regify Provider Manual
- Installation
- Appliance Wizard
- Wizard 2 - Provider Configuration
- SSH Terminal
- Appliance Menu
- Overview
- Network
- Appliance
- Database
- Provider
- Updates
- Howto
Installation
The regify Provider appliance herein referred to as the 'appliance' or 'Provider' is a ready to install and use turnkey system. It requires no Linux knowledge, even though it runs on a specialised Debian Linux system. The following concepts must be understood by the person installing and configuring this appliance:
-
Basic knowledge of IPv4 numbers, host names and DNS
-
Basic conceptual MTA configuration knowledge.
Requirements
A dedicated hardware machine or VMware virtual machine with the following attributes:
The ISO image can be burned onto CD or USB stick and then installed by booting off that. If the machine is a virtual machine then the virtual CD can be pointed at the ISO itself.
Before installing the system it is helpful to provide a few basic things:
-
IP number for the system including the net mask
-
Fully qualified domain name for the host
-
Fully qualified domain name for the server. This can be the same as the host name, but must be resolvable via DNS
Third Party Software
Installation of driver software and programs in the context of virtualisation technologies
regify also provides support for customers who use the regify Provider software appliance or the regigate software appliance on virtual servers (e.g. on VMWare, KVM, VirtualBox or Microsoft Virtual PC) according to the maintenance agreement and in line with commercial practice. As virtualisation technologies emulate functions of physical computers, regify assumes that regify products work in virtual environments as they do in physical environments. Therefore, provisioning of the regify support is based on the assumption that apotential problem or error that is observed in a virtual environment can be replicated in a physical one.
A regify customer may install other software on a regify appliance if such software is critical for the operation of the virtual environment. The existing maintenance agreement between customer and regify also applies for such virtual setups. However, problems or errors that only occur on virtual systems or in combination with software that was installed by the customer are not covered by the maintenance agreement. In such cases, regify reserves the right to charge the customer for time and effort. Moreover, regify does not assume any liability for system failure or loss of data.
System Installation
Insert the boot medium into the computer and boot off of it. For a legacy BIOS type systems the installation looks like this:
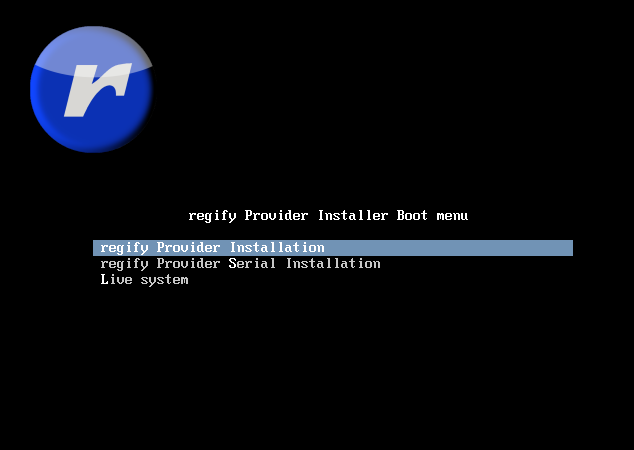
For UEFI installations the installation screen looks like this:
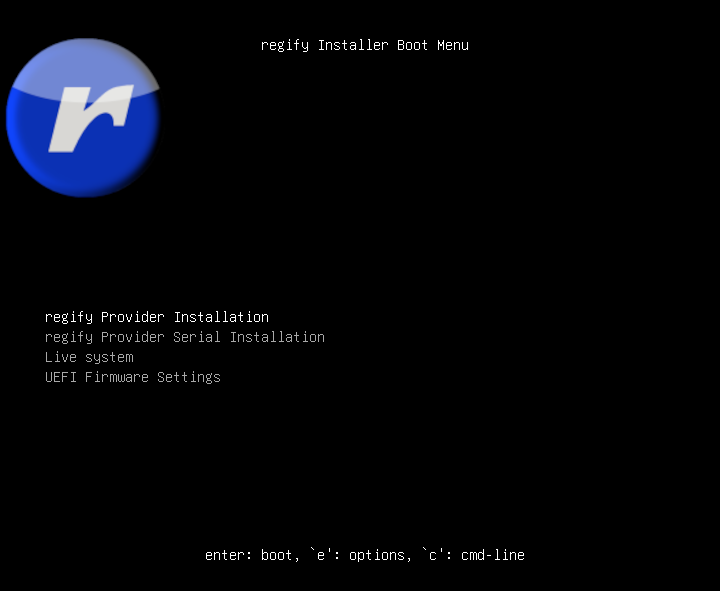
To install simply press enter. This will automatically install the entire system and reboot into the appliance wizard.
If you are installing using a serial connection choose regify Provider Serial Installation and press enter. To use the serial connection insure your client the system to use the following settings.
Serial: Port 0
Baud: 115200
Parity: None
Databits: 8
Flowcontrol: None
Then after the reboot wait for the login prompt.

debian login:
Login to the appliance as user regify password regify.
Appliance Wizard
The first page in the appliance wizard is the end user license agreement (EULA). If it is not accepted, the system will shut itself down. Subsequent reboots will land on the same page. After reading the EULA simply press Tab to move the focus to the Accept button and press Enter.
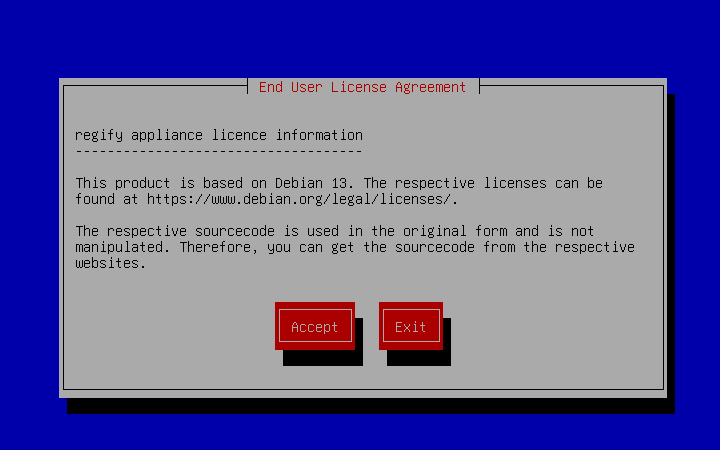
From here on the wizard pages can be resumed at any time by choosing from the appliance menu. This menu entry disappears, when there are no more necessary steps.
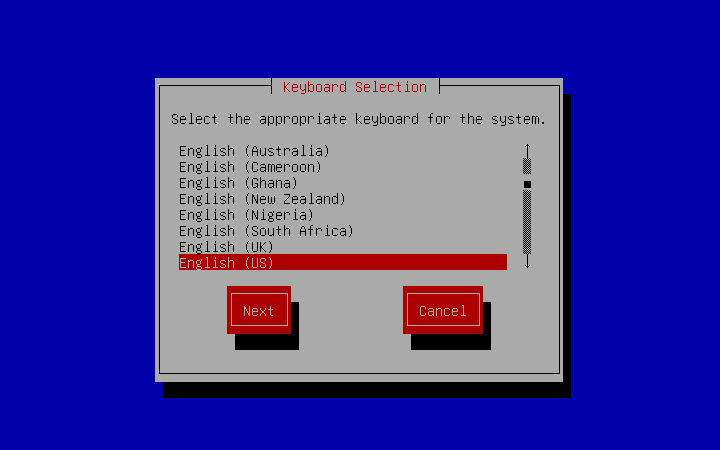
Here you choose your keyboard layout. It only matters when logging in locally, but is important for getting the passwords right. You can use the Arrow keys to choose your layout and hit Tab to choose the Next button.
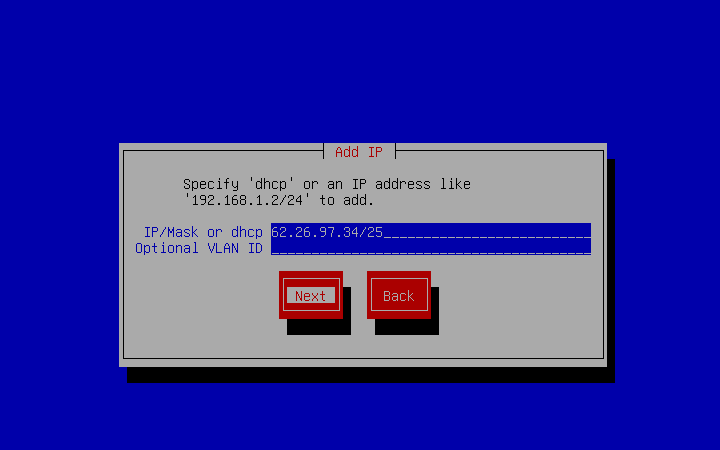
Next we have the basic network configuration to be entered. This should be a static address, but DHCP is also supported. VLAN ID is optional and can usually be left blank.
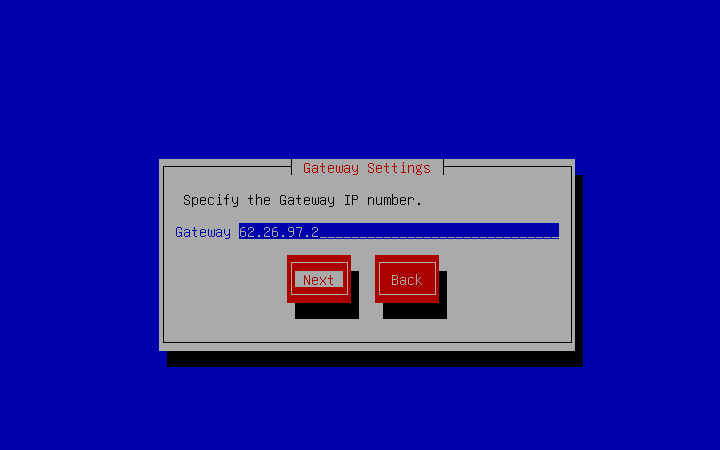
This page allows setting of the gateway. This page does not appear when DHCP was chosen before.
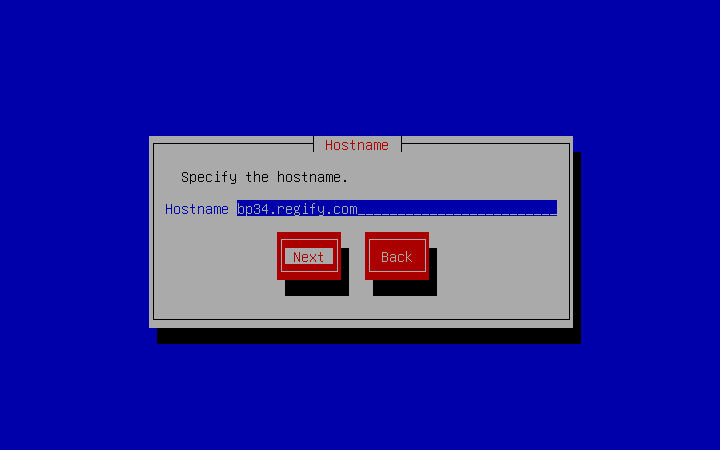
This page allows setting of the host name. While it is not strictly necessary, it is usually better to have the host name resolvable via DNS, because missing or mis-configured DNS can lead to strange and hard to troubleshoot problems.
| When the host is public and sends e-mail, it must have a valid DNS entry. It is best to have the machine name match the reverse DNS PTR record of its IP number. |
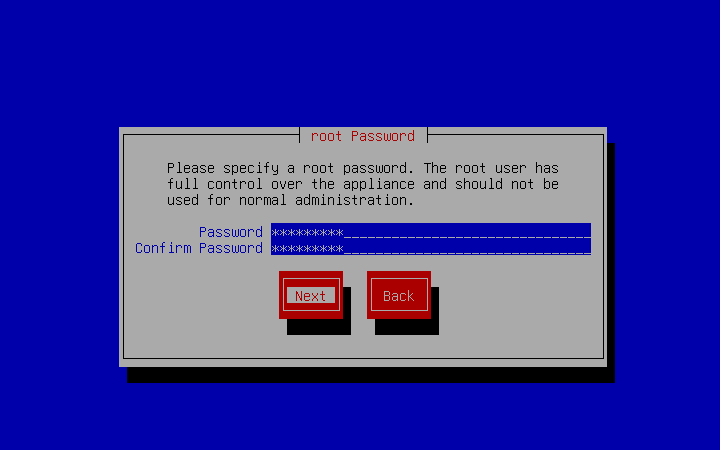
This dialogue is used to set the password for the root account. The root user has complete control over the appliance and should therefore not be used for day to day administration.
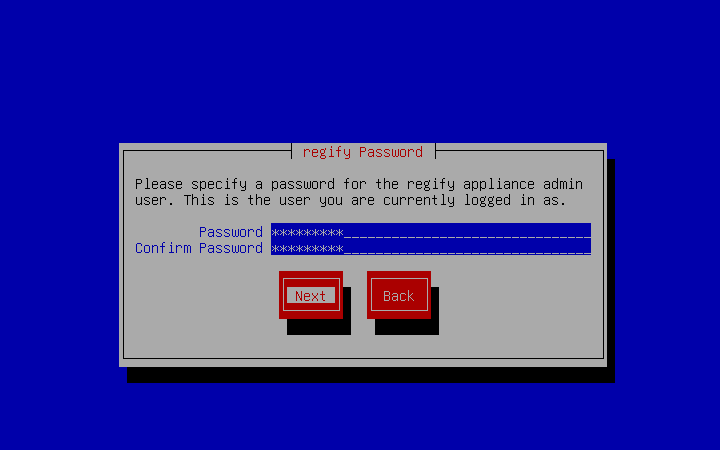
Here is another password dialogue, but this one is for the regify appliance user. This is the account used to administer the regify Provider appliance. The login account is called regify and the password is set in the dialogue below.
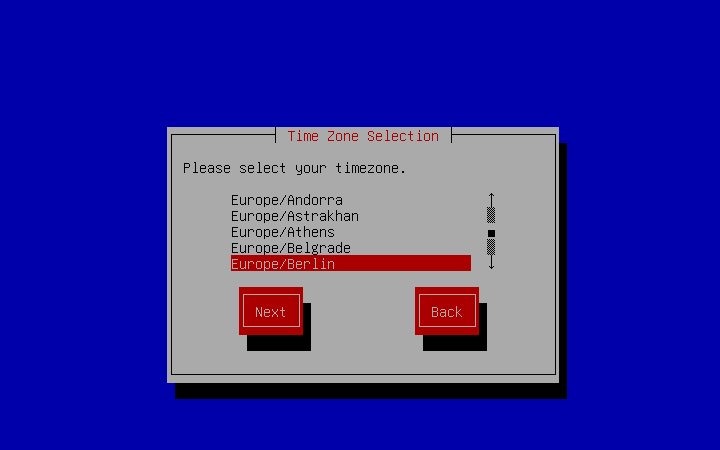
Here you can choose the time zone your appliance is in.
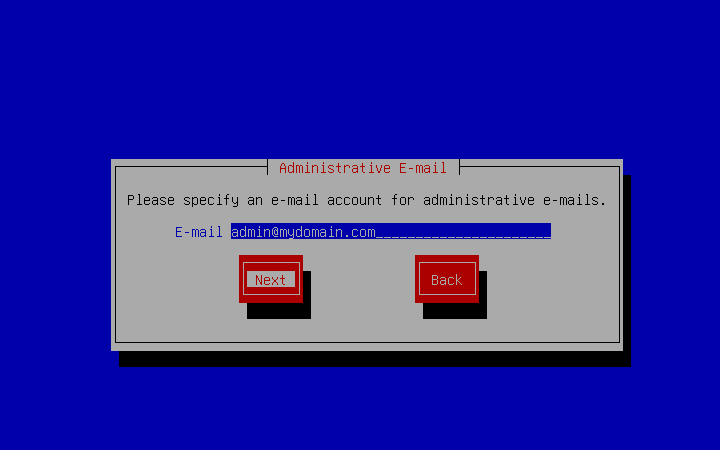
Here you set the administrative e-mail address. This address may receive occasional e-mail from the system.
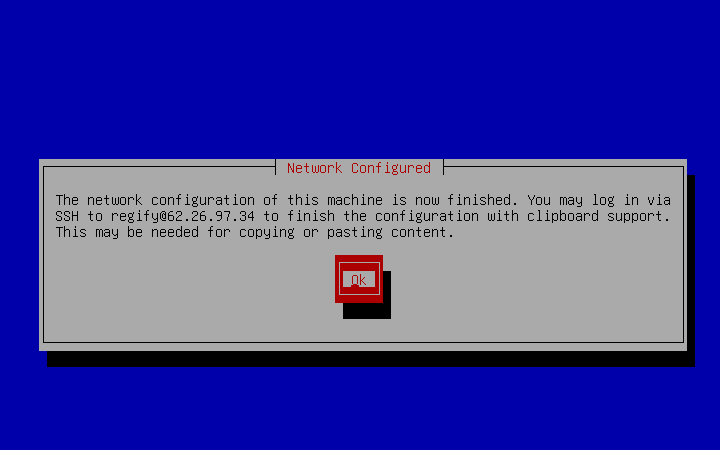
After that the first wizard usually completes. The remainder should be done via a SSH login where there is clipboard availability for credentials and certificates.
| If you plan to use PostgreSQL or CockroachDB instead of MariaDB, please contact regify support for possible options. |
Wizard 2 - Provider Configuration
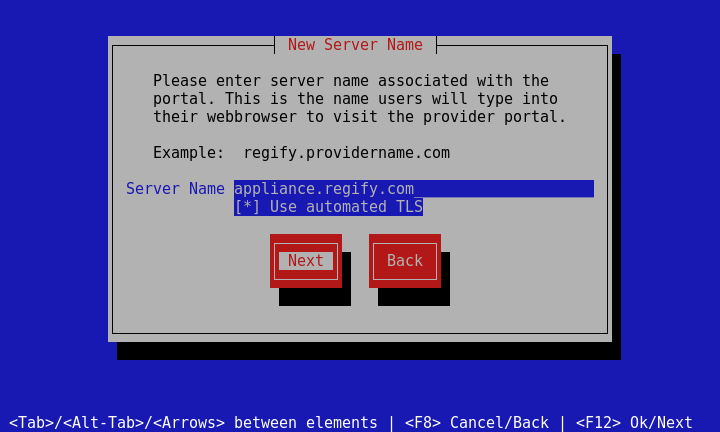
This dialogue asks for the server name. The server name is what the user types into the web browser to visit the portal. So if the user goes to https://regify.providername.com/. Then the server name should be regify.providername.com. While this can very well be the host name.
Automated TLS is supported using Let’s encrypt. This requires Let’s encrypt to access port 80 as well as working DNS resolution for the server name. If this is not yet given, simply turn Use automated TLS off. You can re-enable it at a later time after the requirements can be met.
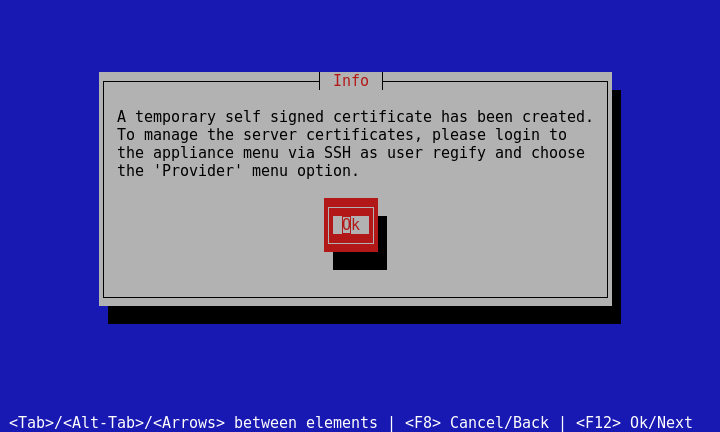
An initial self signed cert is created here. You are informed to come back using an SSH session to administer the key.
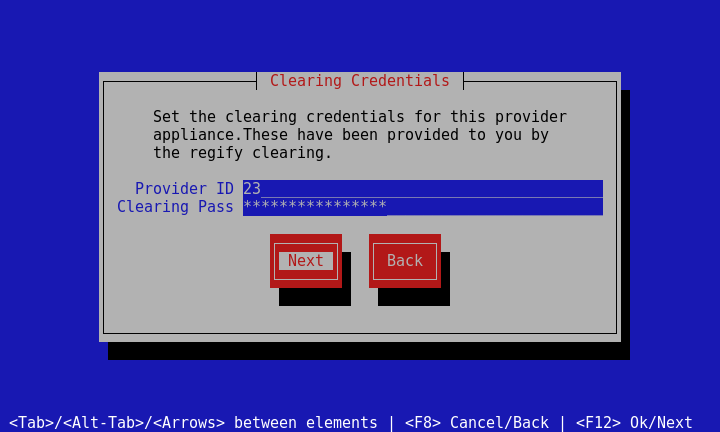
This step is needed once to set the clearing credentials that have been provided to you by the cleaing team.
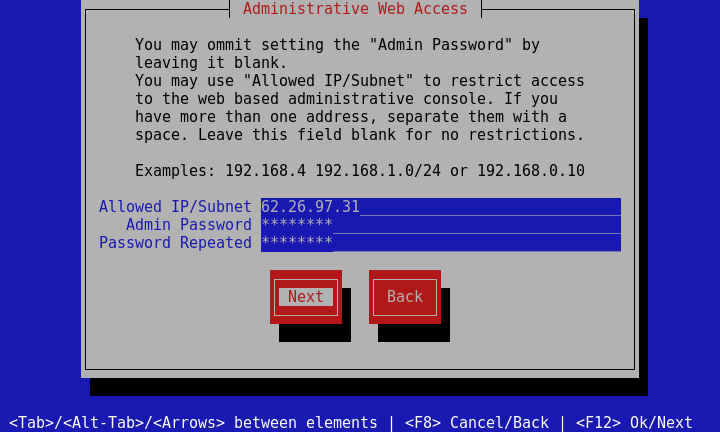
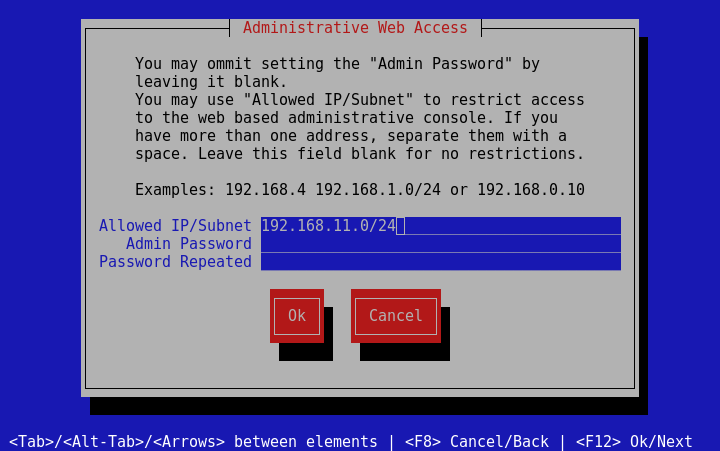
This step allows you to restrict access to the administrative section of the web portal to a specific IP subnet or addresses The admin password must be set, as it is the initial login to the provider and has master admin rights.
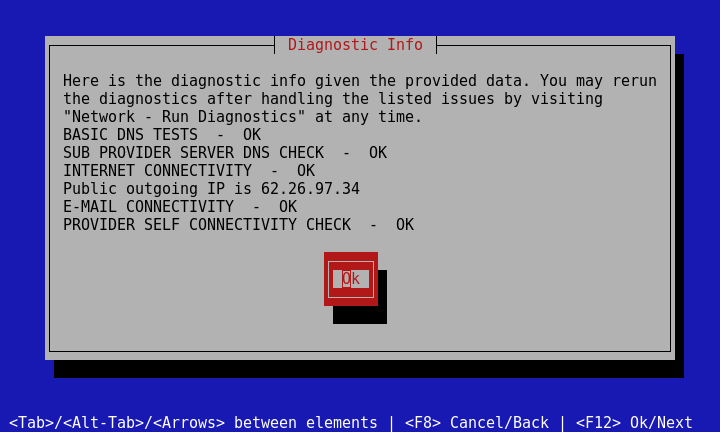
At the end of the wizard diagnostics are run to make you aware of potential issues that need to be remedied, before the system can function properly. Here is an example result.
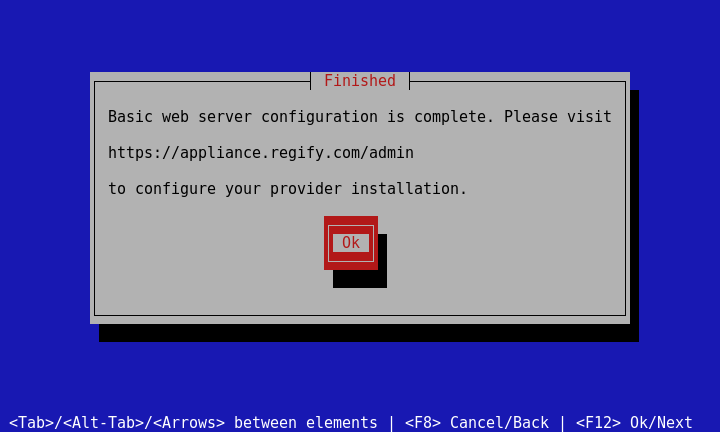
At the end of the wizard you are informed as to where to go to configure your provider installation.
SSH Terminal
Most users use Windows systems. Unfortunately these systems lack terminals and SSH clients. Fortunately there are third party applications available. One such application is called PuTTY and is available for free. You can download it here http://www.putty.org/ . PuTTY does not need to be installed. It can simply be placed onto the desktop and run by double clicking it.
PuTTY Configuration
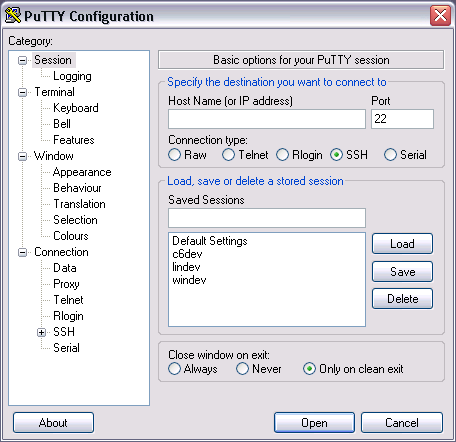
While PuTTY is free and generally works well, it can be a little quirky in the initial configuration. This is why it is covered in detail here. I will setup a configuration for the regify user. I will now go through and make the adjustments needed to connect to the appliance provider2.de.regify.com as the user regify. When initially opening PuTTY you get the following screen.
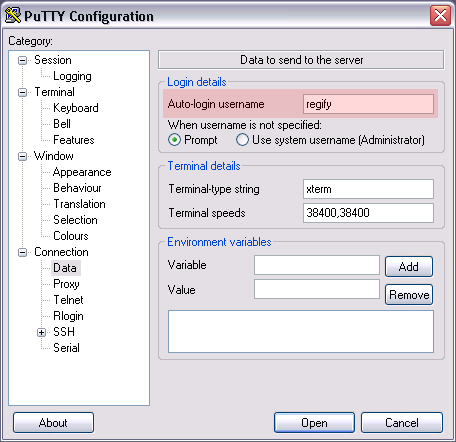
Adding regify as the Auto-login username under saves you from having to type it every time.
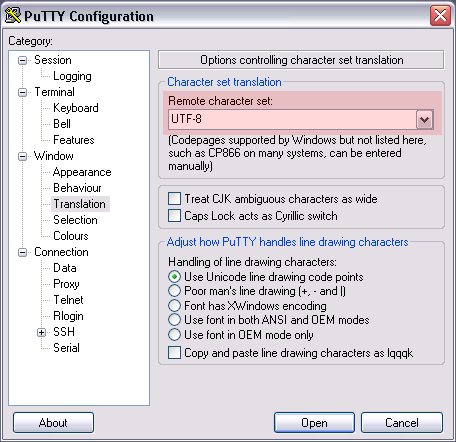
Setting the Remote characters set under to UTF-8 is important.
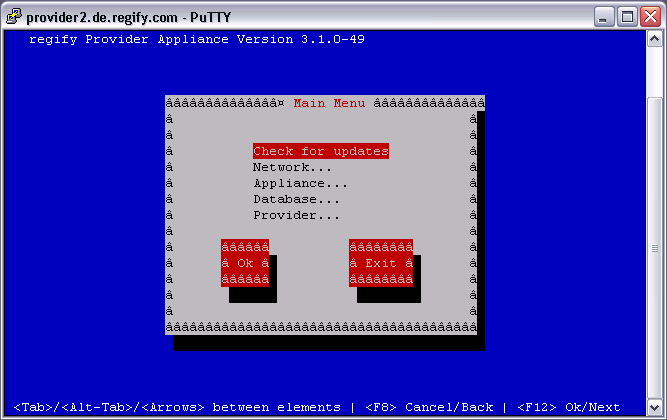
If it’s not set to UTF-8 you’ll get a screen that looks like this.
IMPORTANT:This step is very important and frequently forgotten.
After setting the Host Name, set Saved Sessions and press Save, not Open. This will save these settings for you to use next time.
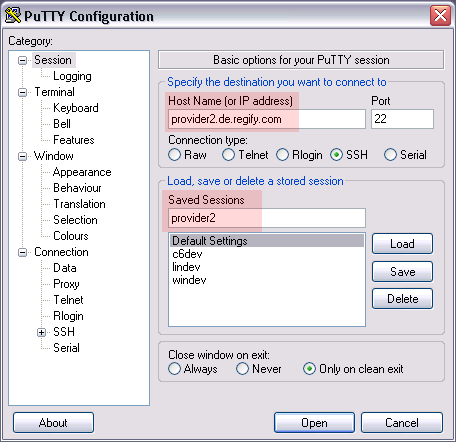
| If you only press Open, PuTTY will forget everything and you’ll have to do this again. |
After pressing Save simply double click the new provider2 entry to open the session.
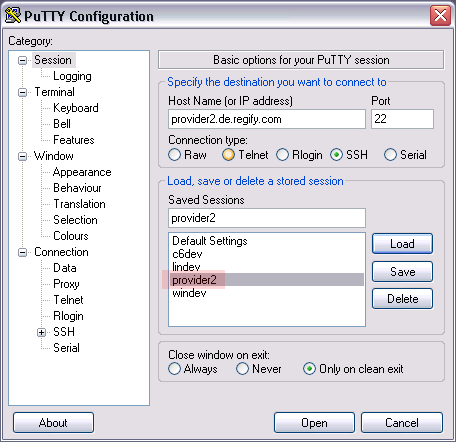
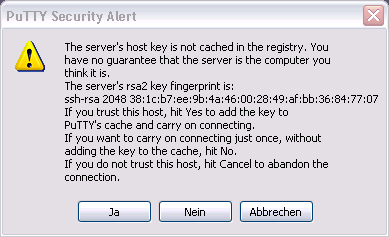
The first time you connect, you will get a prompt that looks something like this. Simply click Yes (Ja).
Now you are prompted for the password for the regify user that you set earlier in the appliance wizard. Enter it here. It will not echo it back, not even as stars. Press Enter when done.
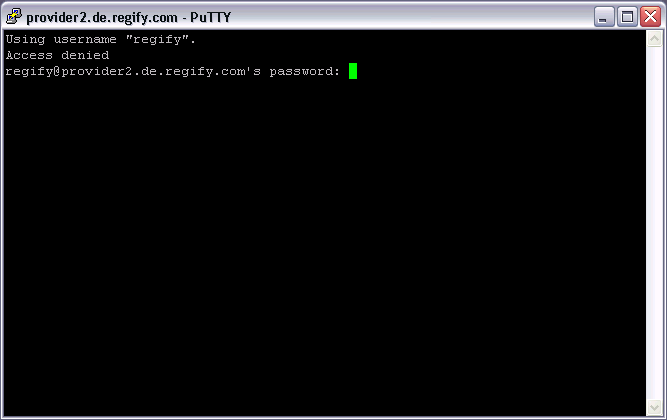
Now you are logged in as the regify user and can administer the appliance. Hitting Tab twice followed by Enter will exit the session again.
Appliance Menu
This menu is accessible via an SSH terminal only. PuTTY is a popular option. There are 2 ways to access this menu:
-
The main method is to log in as regify
-
The alternative is to log in as root if Allow root login in SSH Settings is checked.
-
In this case, run:
-
Overview
In general an appliance entry that ends with … indicates that there is a sub menu structure below the given item. Pressing F8 backs out of dialogues and sub menus, but does not exit the appliance menu. This allow for quickly pressing F8 to get to the top level of the appliance menu without running risk of logging yourself out.
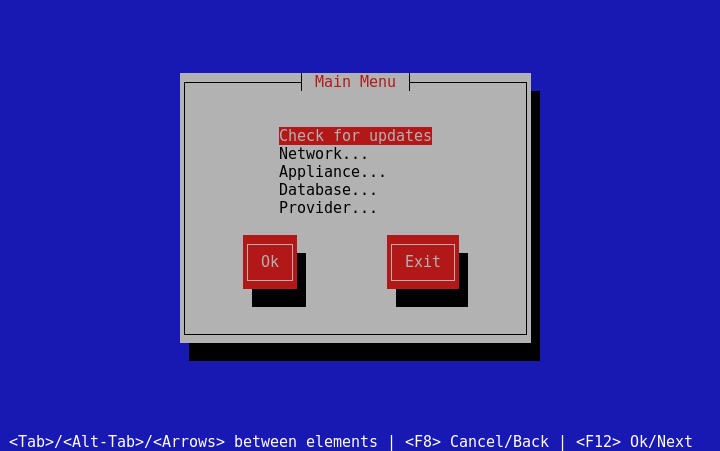
The appliance menu is separated into several major sections and the update functionality. The update functionality handles installing updates to the appliance in a wizard like manner.
The major sections are:
-
Network - handles IP related matters
-
Appliance - appliance configuration like time password, reboot…
-
Database - start/stop database, configure replication
-
Provider - Web server and provider related items
These are covered in greater detail in the following sections.
Network
Even though the appliance menu protects against this, care needs to be taken in this section when connecting remotely. When changing IP numbers remotely it is best to first add the new IP, disconnect and log back into the machine using the new IP, and then deleting the old IP.
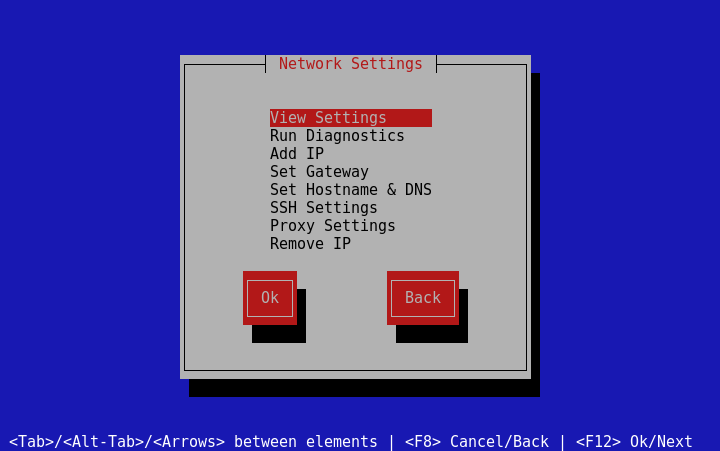
View Settings
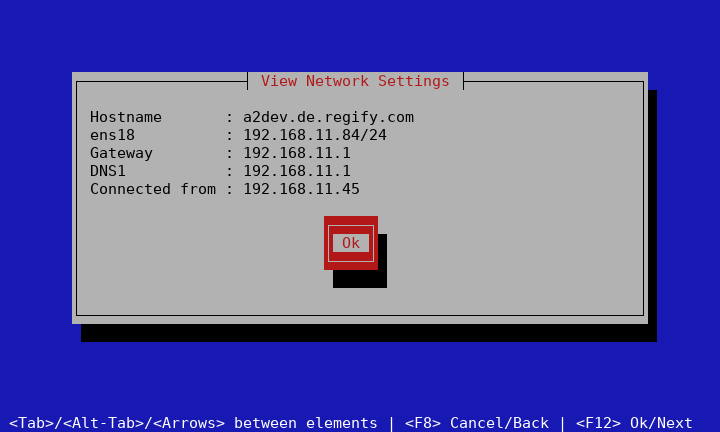
The page gives you a general overview of the network settings. It lists the host name, all configured interfaces and DNS servers.
Run Diagnostics
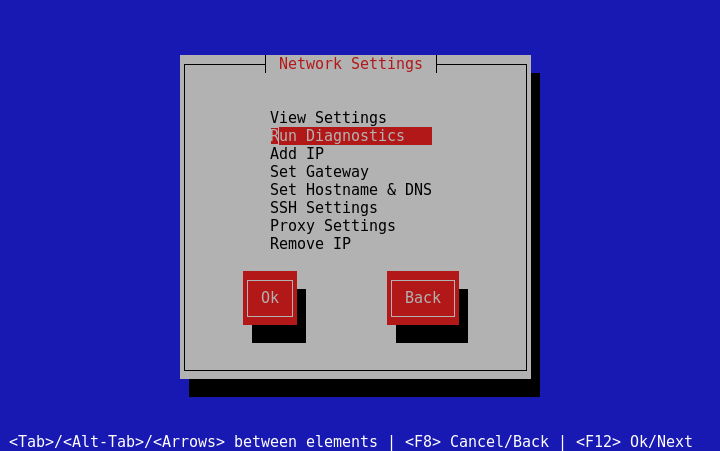
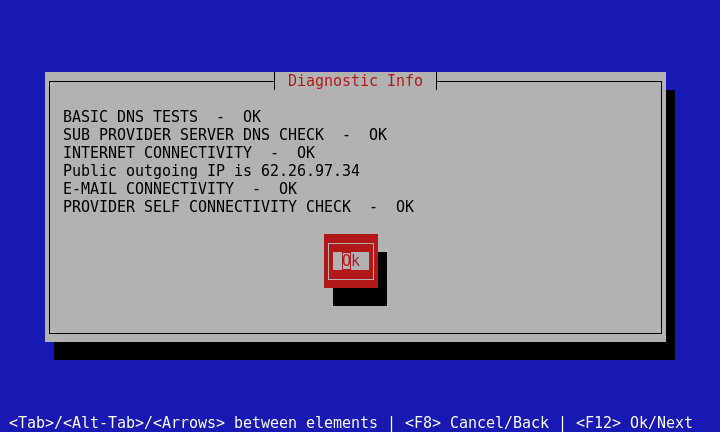
Since there are many things that can be done incorrectly between DNS entries and server configurations, a diagnostics tool is installed that aims to point out common mis configurations and their remedies. It can be found under .
In this screenshot everything is correct, except for the fact that this internal machine used for making these screen shots is not accessible from the internet.
Add IP
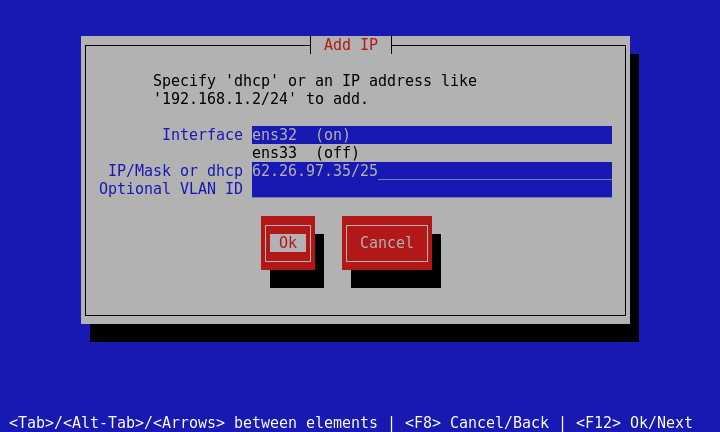
allows you to do just that. Interface lists the available network adaptors when there is more than one to choose from. The (on) suffix means it’s plugged in, while (off) means it is not. Simply choose the Interface, specify the IP Number and Netmask and hit Ok. If you are running an 802.1Q VLAN, add the proper VLAN ID, otherwise just leave this field blank. The network will get restarted making the change immediate. This will take a second or 2 to complete.
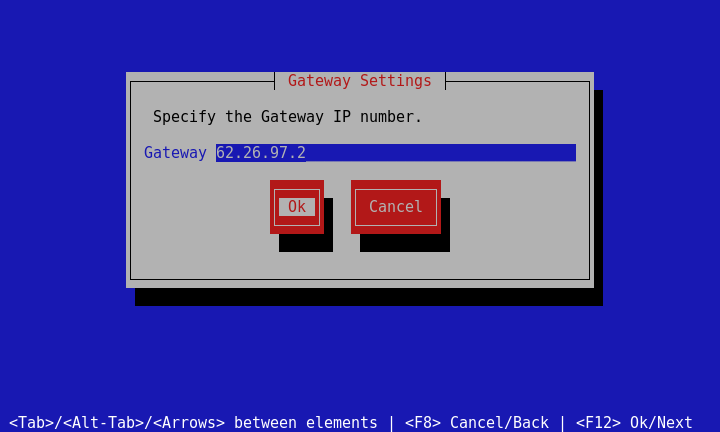
Set Gateway
allows you to set the default gateway for the system. Simply type in the IP number of the gateway Tab to Ok and press Enter.
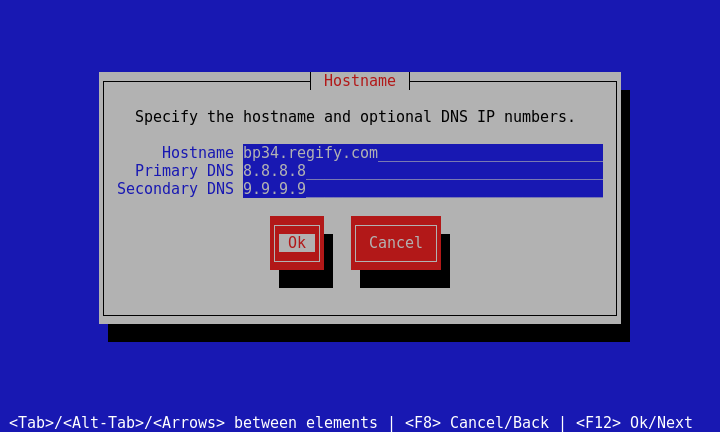
Set Hostname & DNS
allows you to specify the Hostname and up to 2 DNS servers. The DNS servers can be safely omitted to use the built-in internal DNS server. It is good practise but not mandatory for the given host name to be resolvable by the given DNS entry.
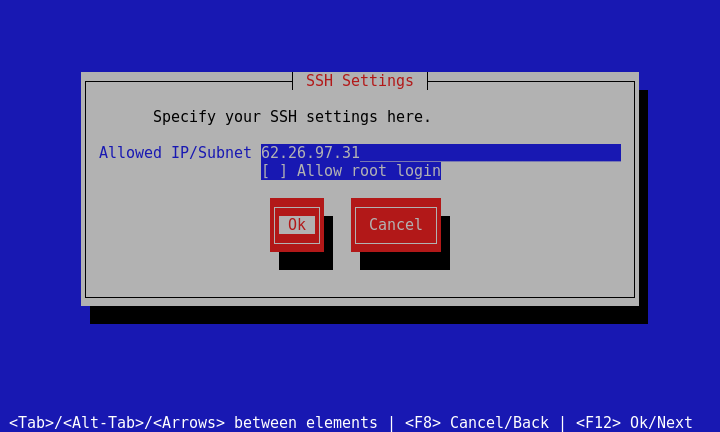
SSH Settings
By default SSH root login is disabled and general access is only allowed from the local subnet. This is for security reasons. At you may specify one or more space delimited IP numbers or subnets to access the appliance. The following entries are legal and equivalent:
-
192.168.11
-
192.168.11.0/24
-
192.168.11.134/24
Or:
-
192.168.11.134
-
192.168.11.134/32
You may check Allow root login if needed. This is only needed to setup database replication or High Availability.
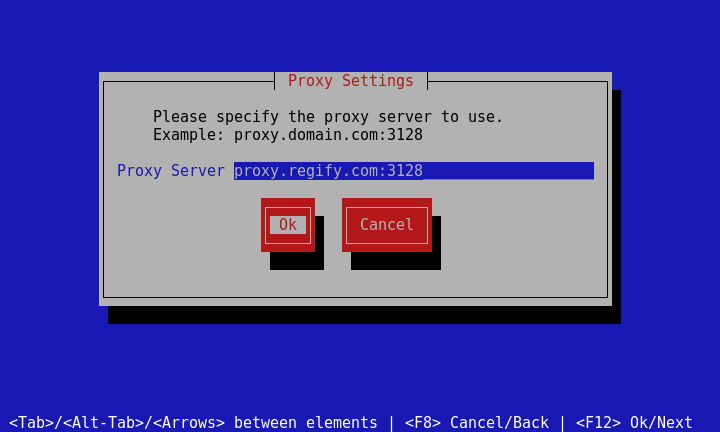
Proxy Settings
allows you to specify a proxy server to use when making HTTP or HTTPS calls to for example the update repository or the clearing server. This can be in the format of PROTO://HOST:PORT or simply HOST:PORT.
Remove IP
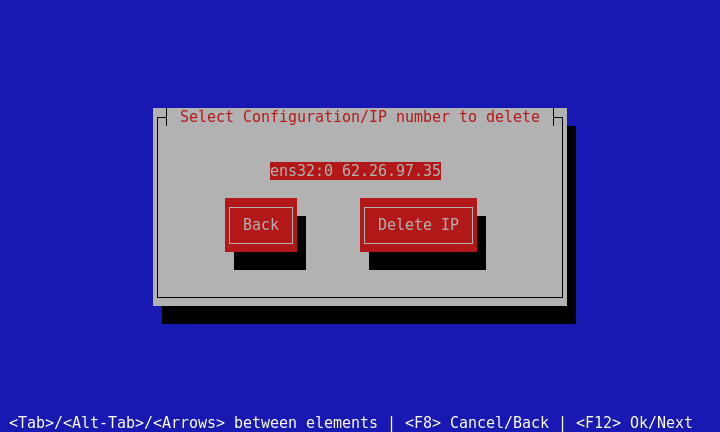
allows you to remove an IP number. It is fine to do this over the network since it will not allow you to remove the IP number with which you are logged in as. Use the Arrow keys to select 62.26.97.35 and hit Tab twice to get to the Delete IP button and hit Enter.
Appliance
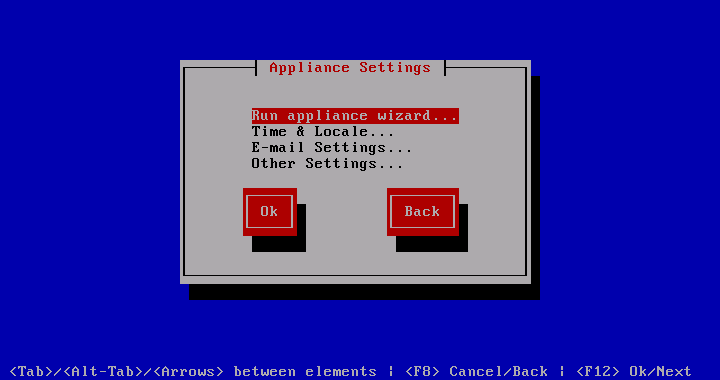
The Appliance… section handles things that pertain to an individual machine.
Run appliance wizard
can be used to run through the appliance wizard again. There is no harm in running it more than once and it provides a coherent alternative to making changes in the appliance menu.
Time & Locale
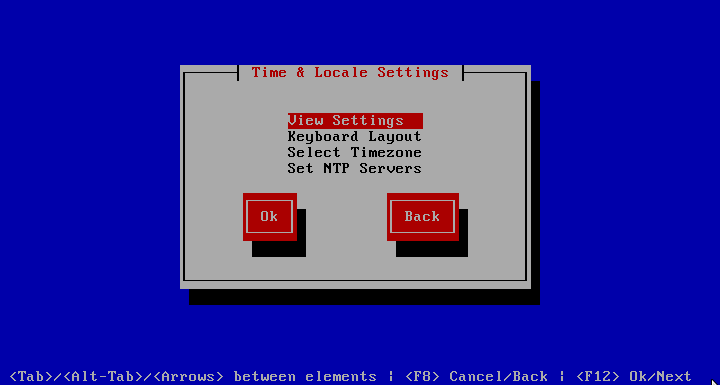
Use to set Localisation Settings.
View Time Settings
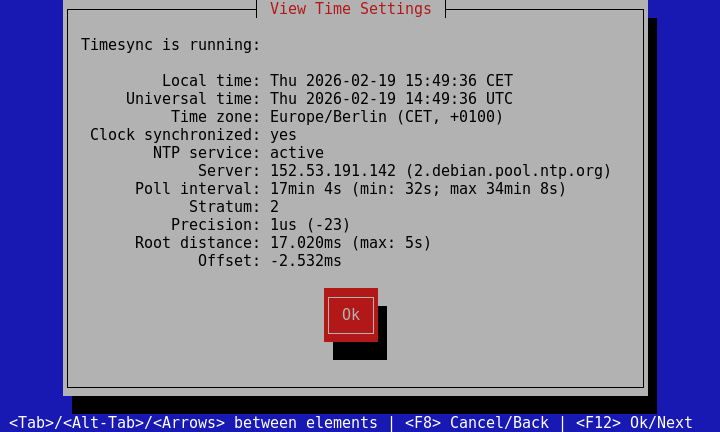
The dialogue shows the state of the Timesync daemon as well as the current time and time zone. Most of these settings are fairly self explanatory.
You can find Stratum documented here http://en.wikipedia.org/wiki/Network_Time_Protocol#Clock_strata
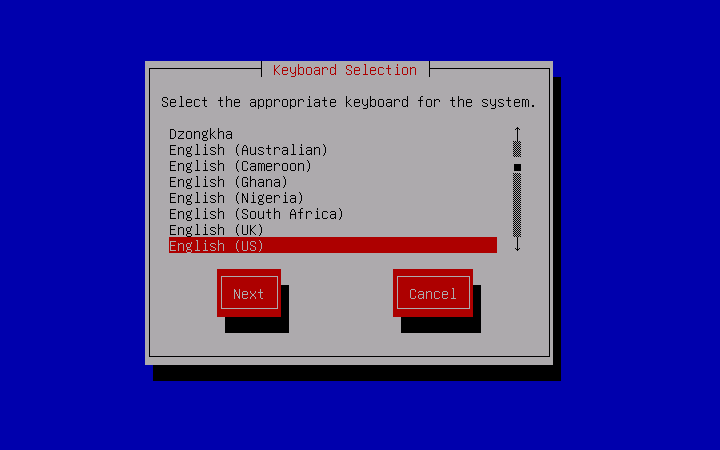
Keyboard Layout
In you can change the keyboard layout for the console. Use the Arrow keys to choose the layout and press Tab to switch to the Ok button and hit Enter.
| This setting has no influence on PuTTY or other remote sessions. |
Set NTP Servers
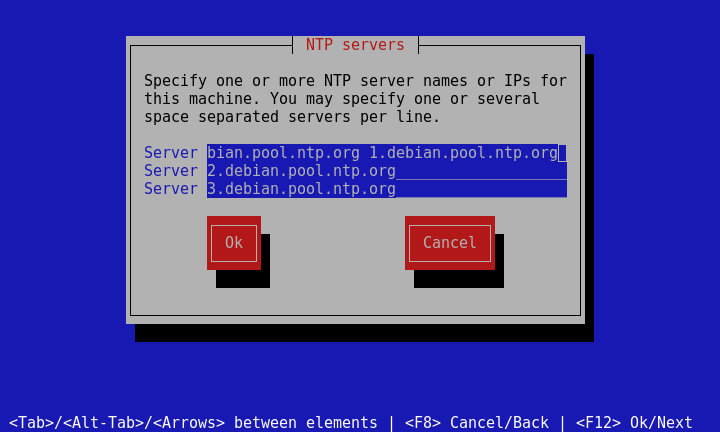
The setting show up when NTP is enabled only. It allows you to specify one or more NTP server host names or IP addresses. Servers may be specified one or more per line. When specifying more than one per line separate them with spaces.
Select Timezone
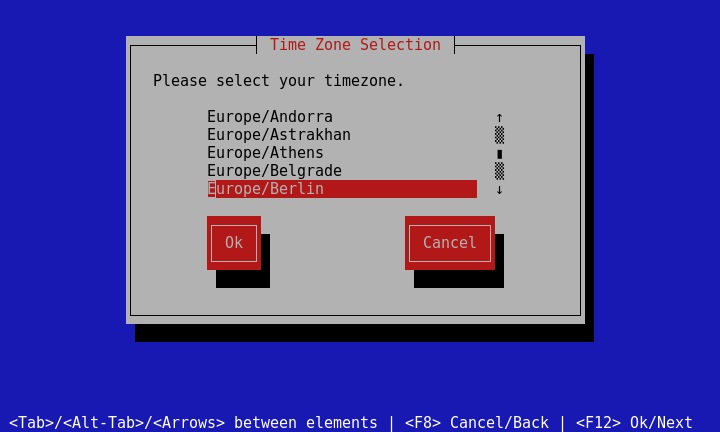
Use to select the time zone the system is in. Use the Arrow keys to choose the time zone and press Tab to switch to the Ok button and hit Enter.
E-mail Settings
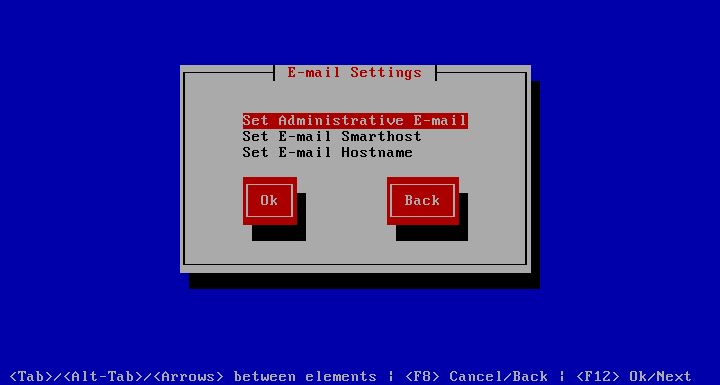
Visit to set anything relating to sending e-mails.
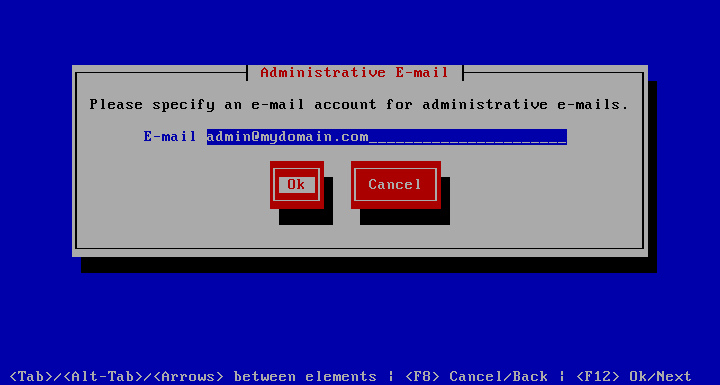
Set Administrative E-mail
The allows you to set the administrative e-mail address. This address may receive occasional e-mail from the system.
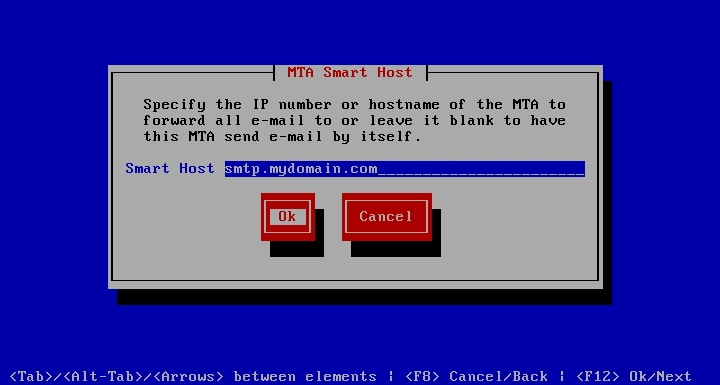
Set E-mail Smarthost
In some configurations it is not possible for a given server to send e-mail by itself. To accommodate this situation, you may use to tell the server to route all SMTP (e-mail) traffic through the given host.
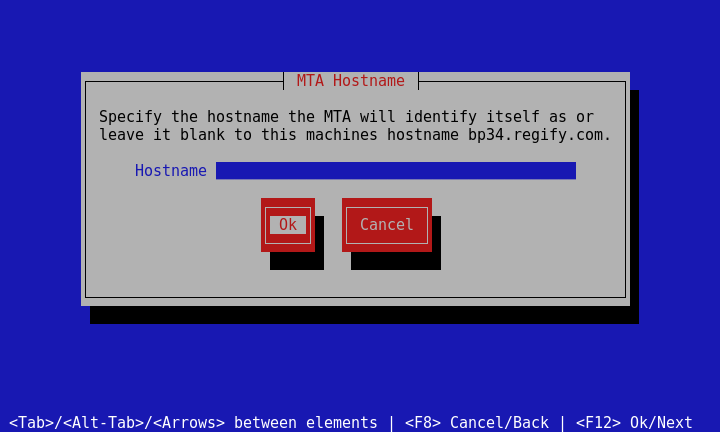
Set E-mail Hostname
dialogue can be used to override the default host name, the appliance MTA (Mail Transfer Agent, aka E-mail Server) claims to be. This is necessary when an appliance is located off limits to the internet.
It is important to insure that this name has the following properties:
-
A reverse DNS lookup of the outgoing IP address has to resolve to the name specified here. The outgoing IP address is the address an outside MTA sees when this machine connects to it.
-
A forward DNS lookup of this name should result in the above mentioned outgoing IP address.
When one or more of these requirements are not met, it is likely that e-mail from this machine will be marked as spam or not be delivered at all.
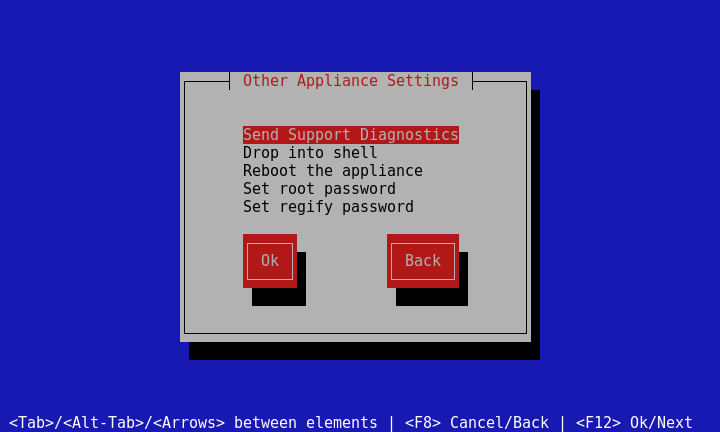
Other Settings
Visit for support diagnostics and other system maintenance work.
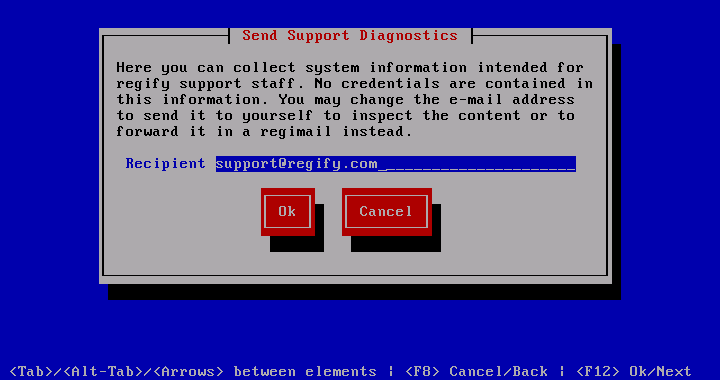
Support Diagnostics
This menu allows you to send comprehensive but not sensitive system information to regify support. Should you feel that your system setting are sensitive, you may send this information to yourself and then forward it via regimail to regify support. If even that is insecure, then log onto the console as root and run regifyInfo. Then copy the output and send it via regimail to regify support.
Drop into shell
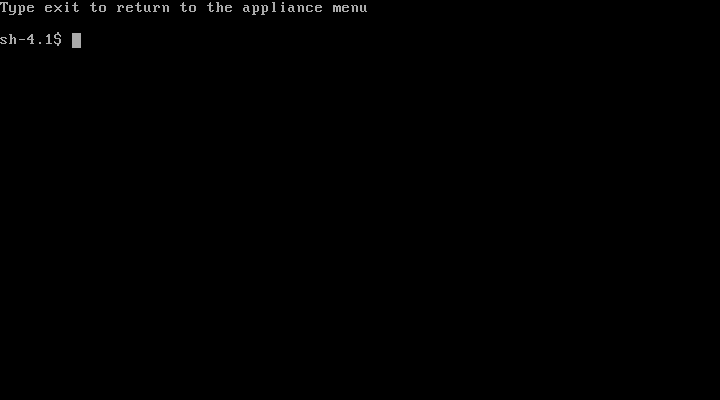
provides the regify user with a command line shell to perform advanced operations. Unlike normal administrative appliance tasks, these operations do require Linux knowledge and are not recommended, unless you know what you are doing or are directed by regify technical staff to do so. As it already says, you can type exit to return to the appliance menu. Usually pressing Ctrl+d by itself will also return you to the appliance menu.
Reboot the appliance
As you might have guessed, the appliance does just that.
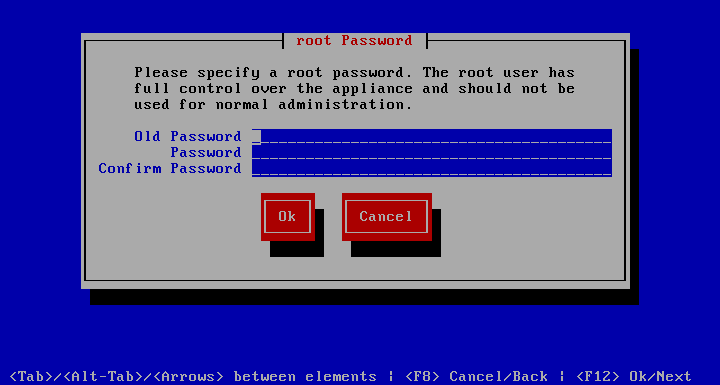
Set root password
to change the password for the root account. For security reasons, the old password must be supplied to create the new one. The password must be at least 8 characters long and contain letters and numbers, but no special characters.
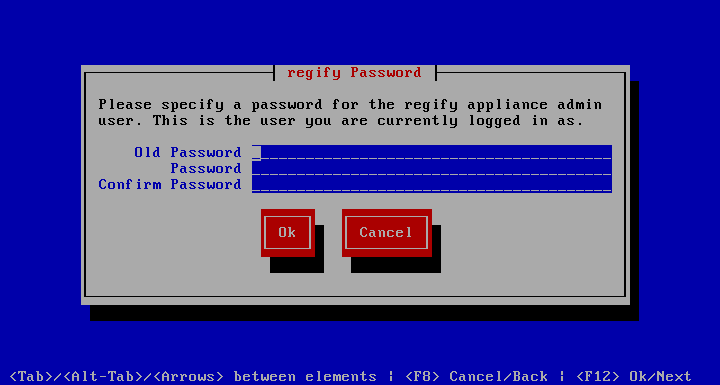
Set regify password
Use to change the password for the regify account. For security reasons, the old password must be supplied to create the new one. The password must be at least 8 characters long and contain letters and numbers, but no special characters.
Database
This menu is somewhat dynamic and shows applicable options based on the chosen configuration. Below are the options visible when the local database is enabled.
| If you plan to use PostgreSQL or CockroachDB instead of MariaDB, please contact regify support for possible options. |
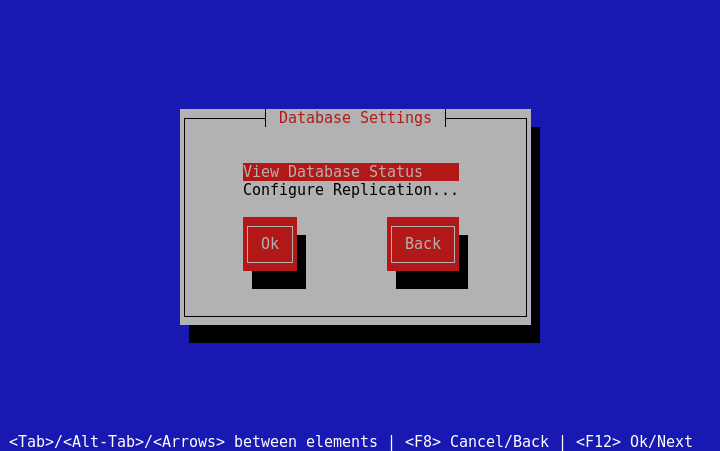
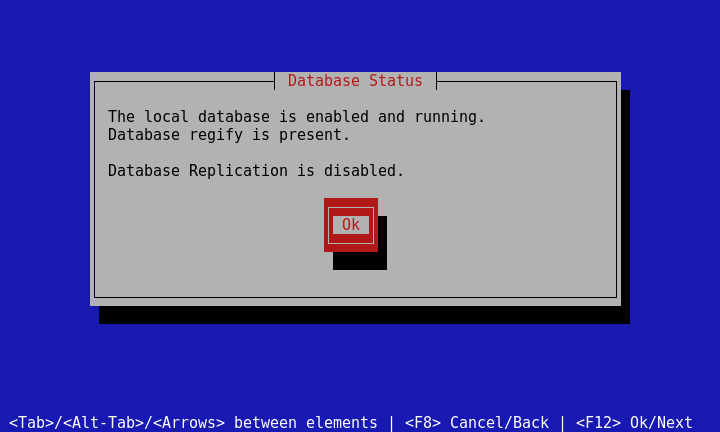
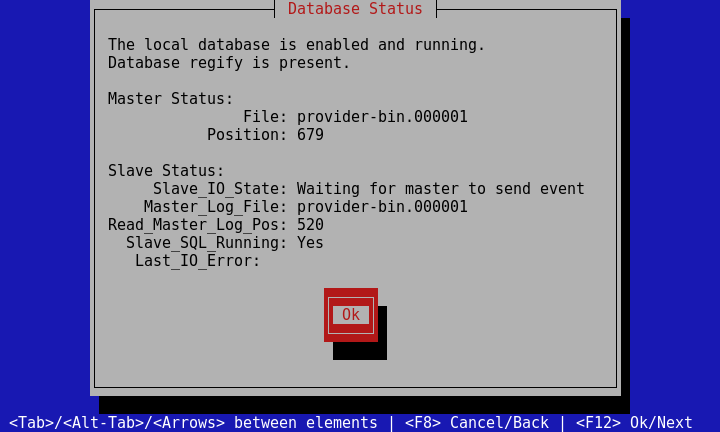
View Database Status
The dialogue gives you a general idea about the current database status.
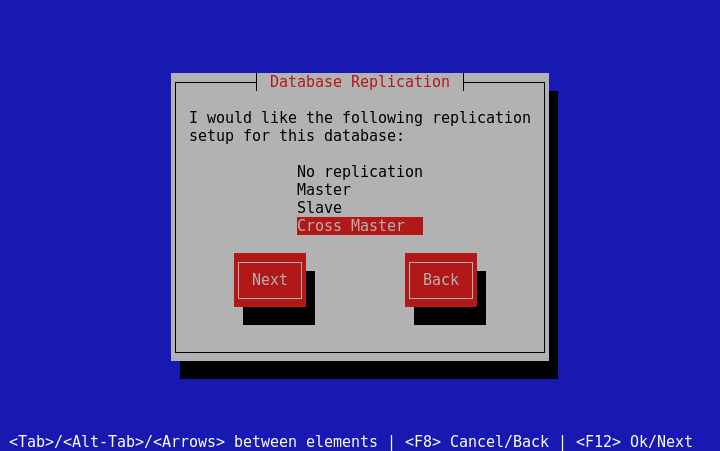
Configure Replication
The page allows you to setup and change replication settings. After making achoice, a mini wizard is started to present you with the relevant dialogues. These are described in detail below.
| It is important to always set replication on all involved systems. When recreating replication scenarios, the first step is always to configure each system to No replication. Then setup your new replication scheme following the steps below as far as they apply. |
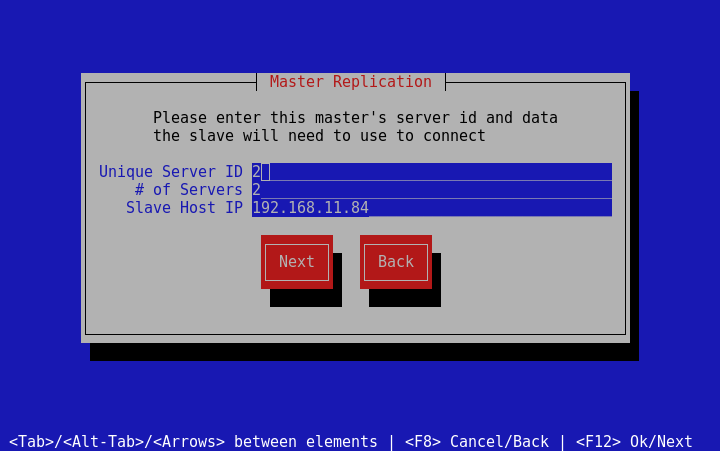
Master Replication
The dialogue is used to setup the master of a replication scheme. Every server in a replication scheme needs to have a unique server id. This number should usually be 1 or 2 since there are 2 servers involved in the replication scheme. Both Slave Settings and Master Settings dialogues contain the Unique Server ID to supply this number. The Slave Host IP field is used to set the IP number or subnet of the slave host(s) that will be connecting to this master for replication updates.
The field accepts IP numbers or networks in the form of:
-
192.168.11.134
-
192.168.11
-
192.168.11.0/24
It does not accept:
-
host names
-
192.168.11.0/255.255.255.0
-
a missing entry
Slave Replication
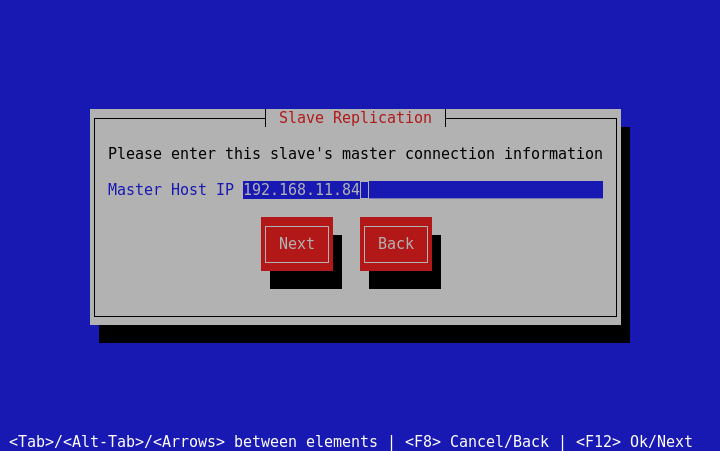
The dialogue is shown when the database acts as a slave. This is the case the when Slave or Cross Master is selected in the dialogue.
Every server in a replication scheme needs to have a unique server id. This number should usually be 1 or 2 since that is the number of servers involved in the replication scheme. Both individual Slave Replication and Master Replication dialogues contain the Unique Server ID to supply this number. If you chose , the slave dialogue will not display the field, because the information was already collected in the dialogue. The Master Host IP field contains the IP number of the server to pull the replication data from. This may not be a subnet.
Replication Synchronisation
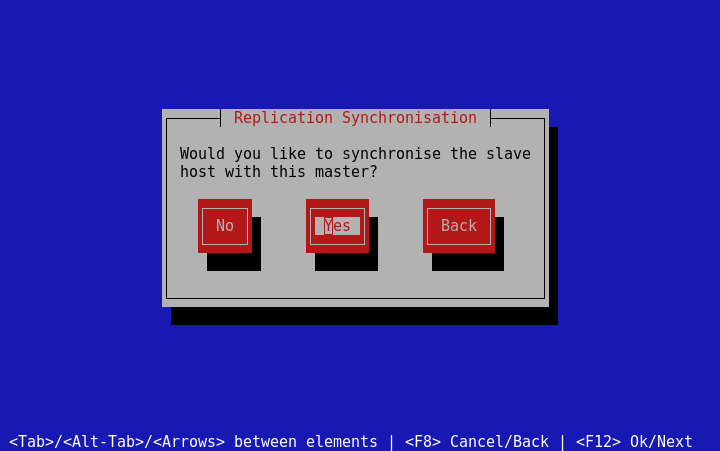
Replication Synchronisation is a helpful feature to initially setup, or at a later time restore, broken replication configurations. This option is only available when the system acts as a replication master. This is the case when Configure Replication is set to Master or Cross Master replication. Replication Synchronisation uses SSH to synchronise the two systems. It is necessary to use the root account and password of the other system to accomplish this. This is one scenario where the system root account is actually used. It is necessary for root SSH login to be enabled on the slave system. To enable it, log into the other system as the user regify and go to and check the Allow root login option.
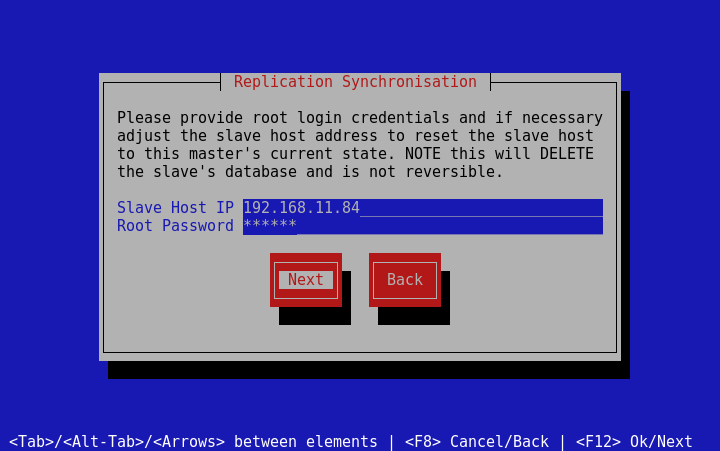
The Slave Host IP field takes the IP number of the slave host. Note that this field defaults to the setting specified in and may be a subnet in the form of 192.168.11.0/24 in which case it needs to be adjusted to point to the actual host. The Root Password field expects the root password of the slave host.
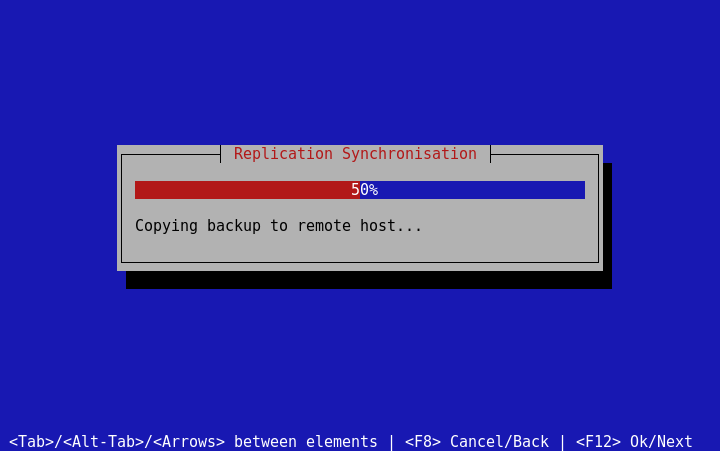
Because this process can take a considerable amount of time, a progress bar is displayed.
Example: Cross Master Replication
The following table describes the settings chosen on two example systems running in a cross master replication scheme. The first system has the IP number 192.168.1.1 and the second is 192.168.1.2.
| It is necessary to first run the appliance wizards on both machines involved to create an initial configuration and set the clearing credentials. |
| If restoring a previously broken cross master replication scheme, it is necessary to first set both machines to No replication in order to bring them to a known state. |
Deploying this replication scheme is best done using the following steps:
| Machine Info | ||
|---|---|---|
IP Number |
192.168.1.1 |
192.168.1.2 |
Database Replication |
||
Cross Master |
Cross Master |
|
Master Replication |
||
Unique Server ID |
1 |
2 |
# of Servers |
2 |
2 |
Slave Host IP |
192.168.1.2 |
192.168.1.1 |
Slave Replication |
||
Master Host IP |
192.168.1.2 |
192.168.1.1 |
Replication Synchronisation |
||
Yes |
No |
|
View Replication Status
When replication has been set up the dialogue may look something like this.
Provider
This section entails everything provider related.
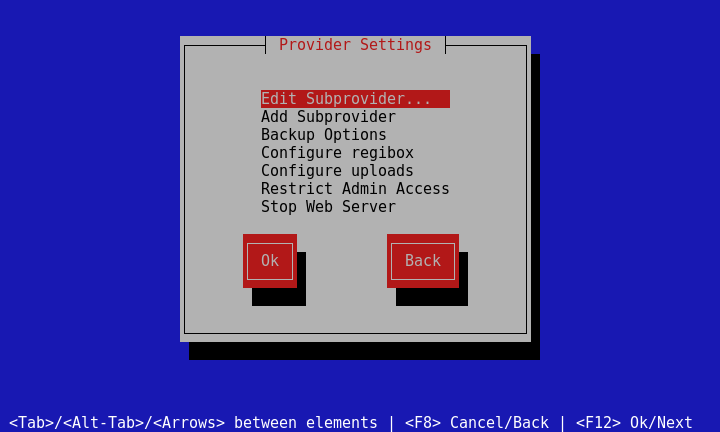
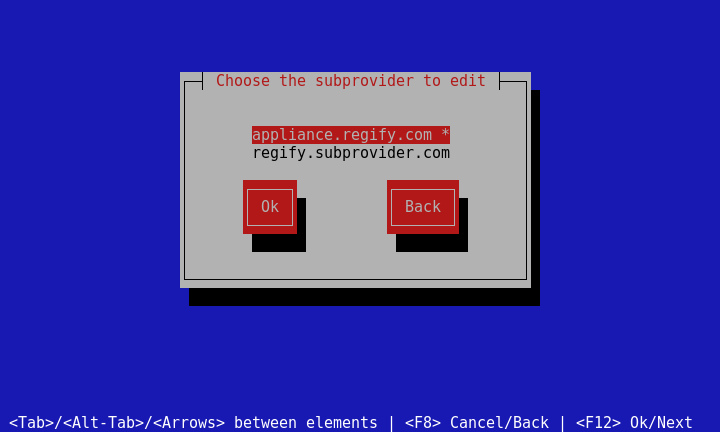
Edit Subprovider
To make changes to a given provider or subprovider, you first choose which provider to operate on. The * indicates the main provider.
After choosing you will get one of the following menus.
Let’s encrypt based providers are relieved of their TLS functionality.
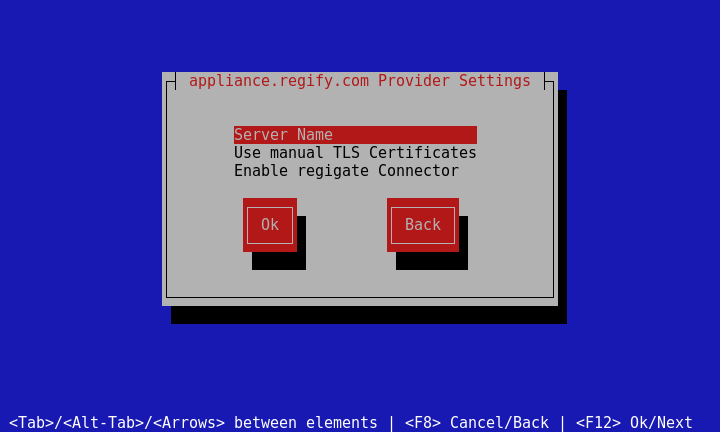
The suffix (Needed) only appears if the certificate is self signed, not when it’s expired.
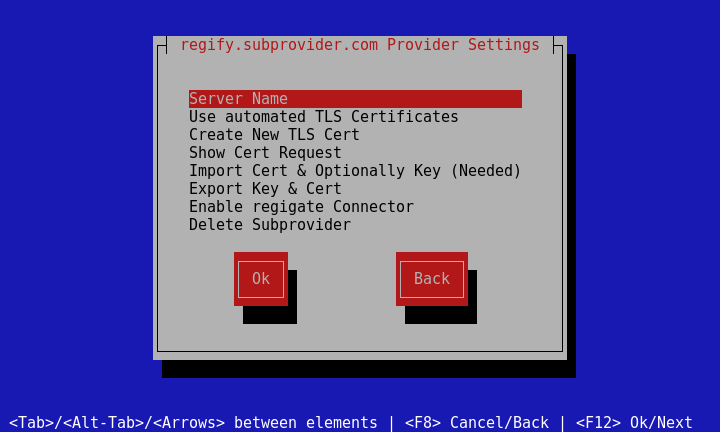
| The Delete Subprovider entry only appears for additional sub providers. The main provider may not be deleted. |
Server Name
The page does the same thing as its wizard counterpart. When the server name is changed the server’s TLS certificate may need to be updated. Be sure to also update the DNS entry to reflect the new name.
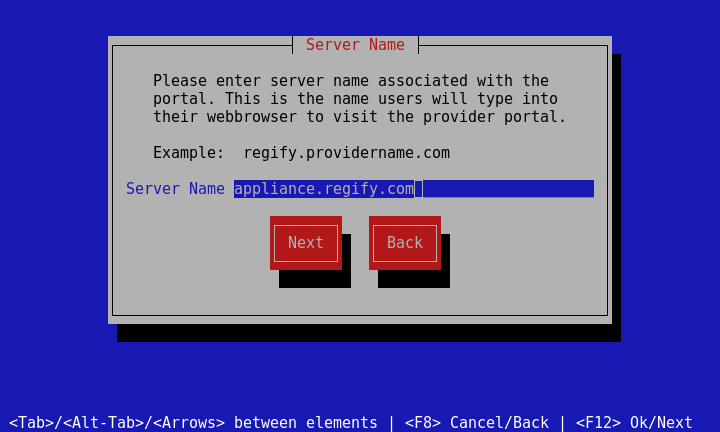
In this case a self signed certificate will be created.
Create New TLS Cert
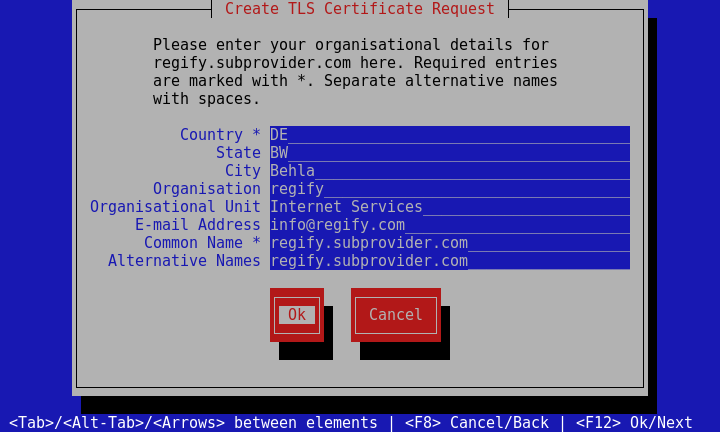
This dialogue allows you to create a completely new key and certificate pair. It is similar to the Show Cert Request dialogue but allows you to create a new key. Unlike the Show Cert Request dialogue Create New TLS Cert will impact a running system and should only be used when the private key has been compromised.
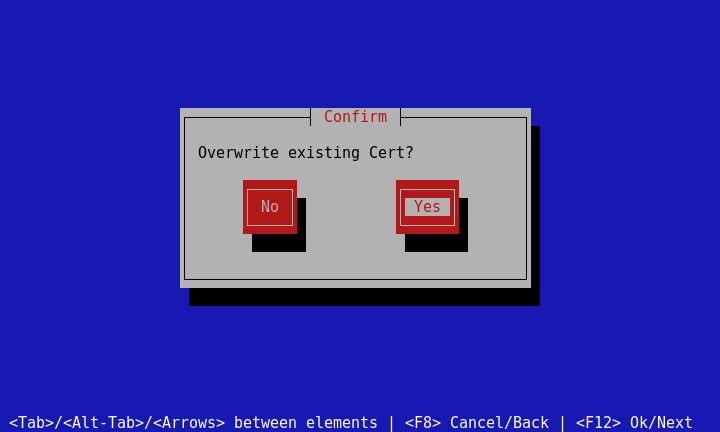
Choosing No here will abort the procedure; while Yes will create a new self signed certificate.
Choosing No will leave the old key intact; while Yes will create a new one.
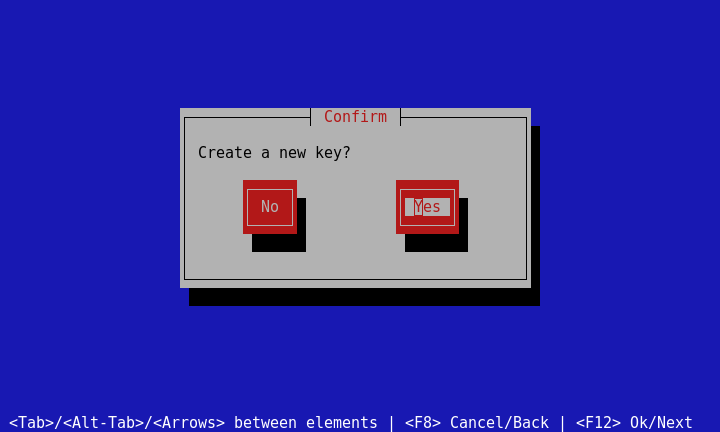
After this the new certificate will need to be signed again.
Show Cert Request
Signing a server certificate is something that is done on a single server install or on one of many servers running in a cluster. For the remaining machines in a cluster see Import Cert & Optionally Key. I will cover the process of getting the certificate request and importing the signed certificate using PuTTY. First choose Show Cert Request. This will first give you the opportunity to change the certificate subject. The Common Name is mandatory for compatibility reasons. If Alternative Names is empty the common name will be placed there. The Alternative Names field may contain a list of names of which at least one must match the server name.
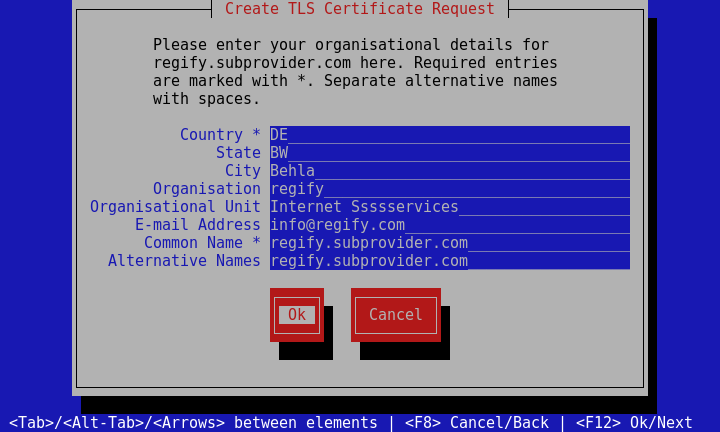
Then it will bring up something like this.
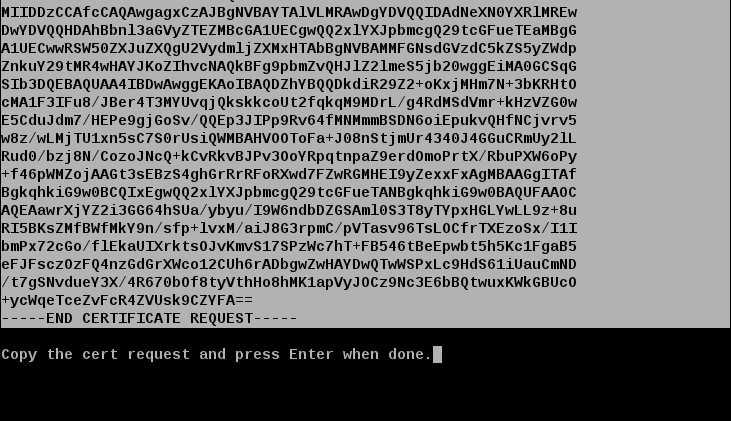
When the upper section is selected using PuTTY, it also means, it has been copied to the clipboard.
There’s no need to right-click or press Ctrl+c or Ctrl+Insert.
Simply press Enter after the certificate request has been selected.
Now go and paste the certificate request into wherever your TLS Certificate provider tells you to.
This could be a file or a web form. After you have received the certificate from your certificate provider, import it using the Import Cert & Optionally Key option.
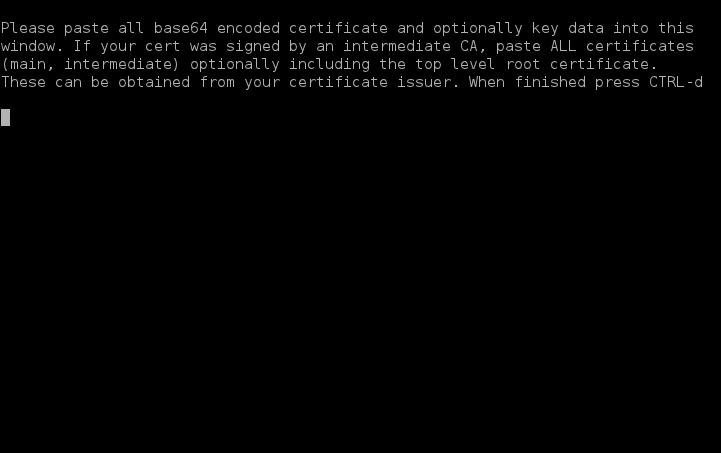
Copy the signed certificate into the clipboard and right click on the PuTTY terminal window to paste it in. If your certificate was signed by an intermediate certificate, be sure to include the complete certificate chain, which your provider should provide you with. Certificate and chain must be in PEM format and can be pasted into the terminal in any given order. To be on the safe side press Enter between multiple paste operations to ensure that each certificate starts on its own line. Press Ctrl+D to complete the operation once everything has been pasted into the terminal.
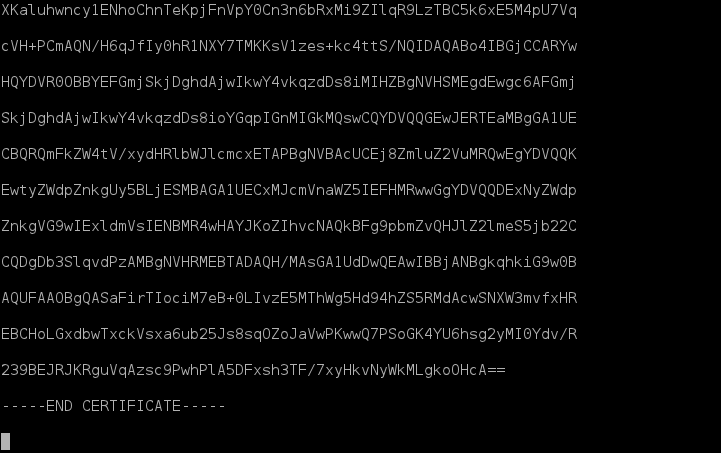
If you have successfully imported the signed certificate you’ll see a screen that looks somewhat like this one.
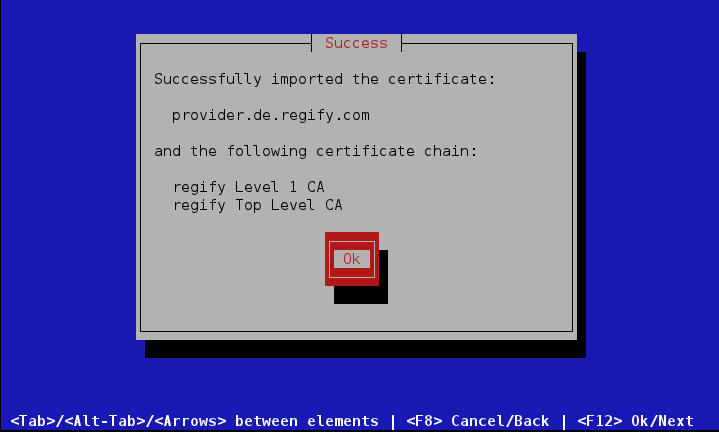
Import Cert & Optionally Key
This dialogue is used to import either a signed certificate originating from a certificate request created by this server, or a complete key and certificate created and exported from somewhere else. Complete import is usually the case when you have a cluster of machines that all use the same TLS certificate. After getting the first certificate signed, you visit Export Key & Cert. First you copy the certificate from there, and then import it on the other machines by visiting Import Cert & Optionally Key.
Regardless of whether it was an export or you just got a certificate request signed, simply copy the contents into the clipboard and right click on the PuTTY terminal window to paste it in. The content must be in PEM encoded format and can be pasted into the terminal in any given order. To be on the safe side press Enter between multiple paste operations to ensure that each certificate starts on its own line. Press Ctrl+d to complete the operation once everything has been pasted into the terminal.
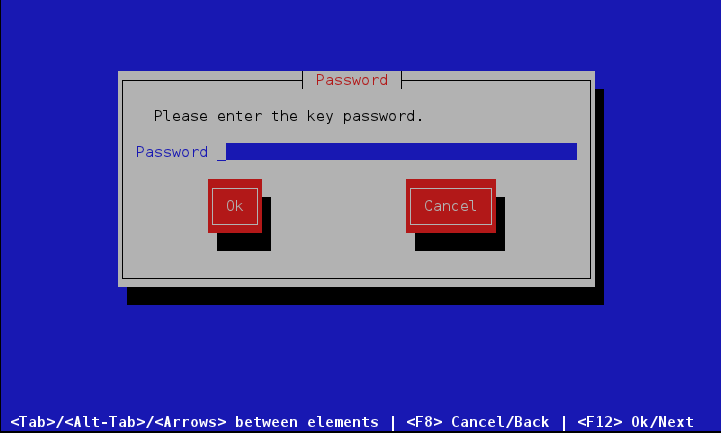
If an encrypted key is included, you will be prompted for the password.
If you have successfully imported the signed certificate you’ll see a screen that looks somewhat like this one.
Export Key & Cert
This option allows you to export the complete TLS key and certificate for backup purposes or for re-importing it on another machine using Import Cert & Optionally Key. For security reasons the appliance will not give out the private keys unencrypted. Choose a good password and remember it, as you will have to provide it when you want to import the key and certificate somewhere.
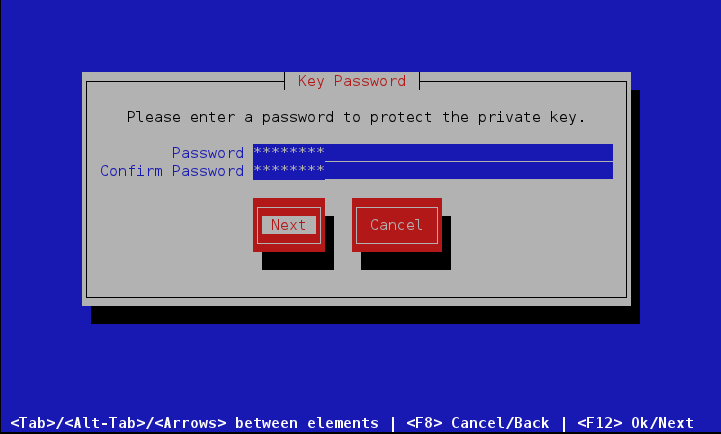
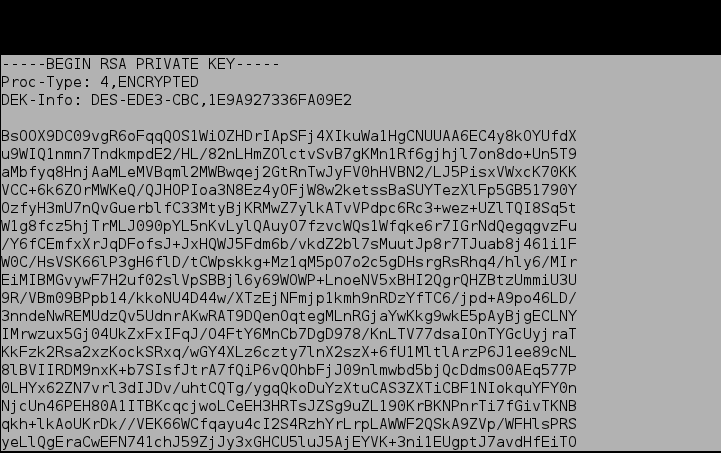
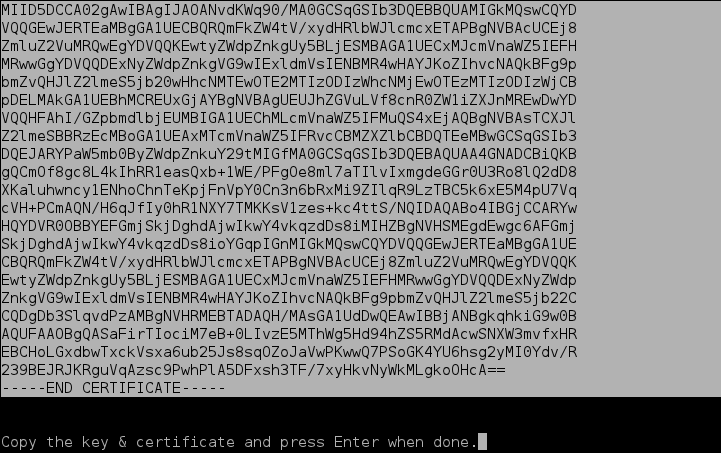
After entering a key password you will be presented with the key and certificates in PEM format to be copied out using the clipboard. You will most likely have to scroll up to the section that starts with the private key and then select everything below that by moving the mouse at the bottom of the PuTTY window until you’ve reached the end. Then paste it into a file.
Enable regigate Connector
This option is available only under the following conditions.
-
The provider is installed and configured. i.e. all wizards has been run.
-
The regigate connector for this sub provider is not enabled.
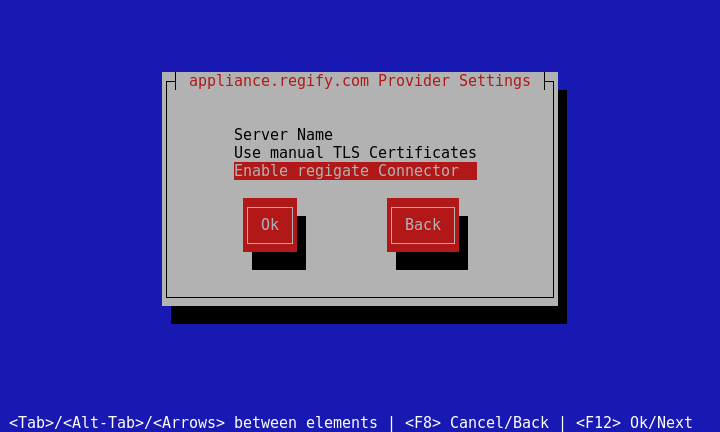
Exercising this option enables the regigate connector for this sub provider. You need to visit the https://Provider Name/admin/ and click Gateway management to white list remote regigates and sign their certificate requests.
This option is available on a per provider basis and multiple sub providers may run concurrent regigate connectors. regigate connectors require a TLS connection. No sessions are used so no state management is required by a potential load balancer.
Running regigate Connectors on multiple Machines
To enable the regigate connector on multiple provider server installations configured in a cross master configuration, go to each appliance menu and visit , Enable regigate Connector. Then visit https://Provider Name/admin/ and click on Gateway management. This link is only available if the regigate connector is enabled on that server. Any changes made to these pages are automatically replicated to all provider machines in the cross master replication.
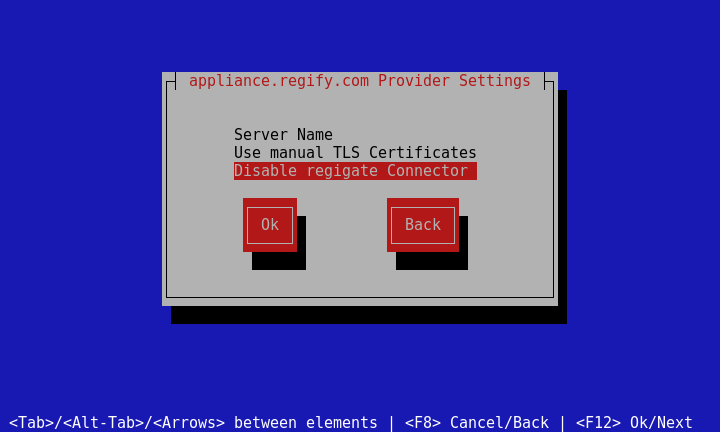
Likewise, to disable the regigate connector, simply visit , Disable regigate Connector on each machine. No further action is needed.
If the regigate connector has been disabled and then re-enabled on any of the machines in the cross master replication, it is necessary to visit https://Provider Name/admin/ and click on Gateway management. There the last enabled regigates will be displayed. To re-enable them simply press Save Changes and they will be enabled on all machines.
| Replication may take up to 5 minutes. To synchronize the changes immediately visit https://Provider Name/admin/ and click on Provider maintenance. Then press Synchronize now. Repeat this process for every server in the replication ring. |
Disable regigate Connector
This option is only show if the regigate connector for this sub provider is currently enabled. Exercising it disables the regigate connector, but does not remove individual regigate entries made in the web GUI under Gateway management. This means that if the regigate connector is disabled and subsequently re-enabled, visiting Gateway management and pressing Save Changes will restore the initial state.
Delete Subprovider
The main provider cannot be deleted. It therefore does not have the menu entry.
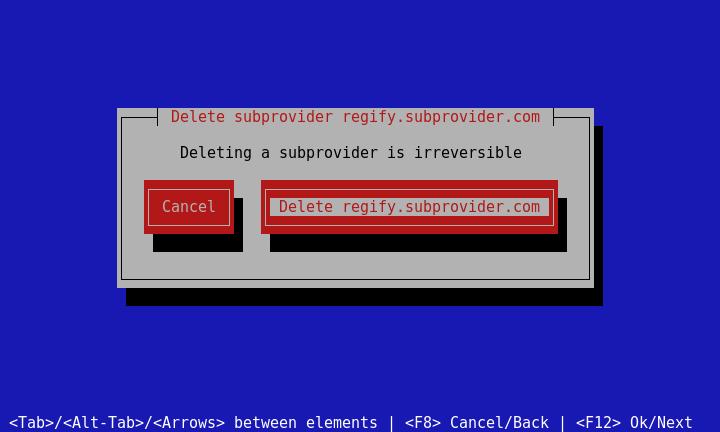
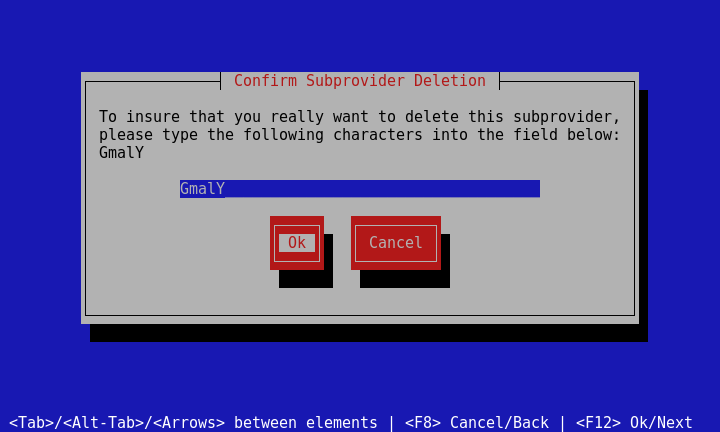
Deleting a sub provider is a major change that is not commonly done. That is why you are prompted to type in the random character sequence to confirm the deletion. The idea is to prevent accidental deletion.
Add Subprovider
The first step is to choose the provider domain name.
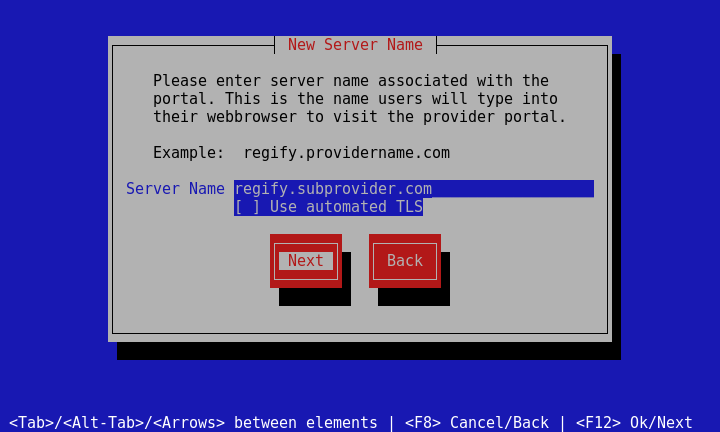
This is followed by the notice about the self signed certificate. Even i n the case of Use automated TLS being checked, the self signed cert is created as a fallback. This screen does not appear when there already is an exisiting certificate.
Backup Options
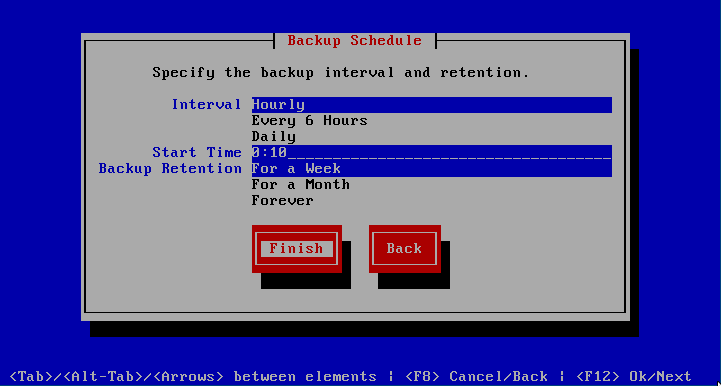
allows you to automatically backup the provider database and configuration file. These backups are important in case data loss has occurred. The Backup Options are organised in a 2 step mini wizard. The first screen obtains and tests the settings for the share where the backups are to be copied to . These settings are validated to insure that writing to the specified share is indeed possible. If an error occurs an e-mail will be sent to the administrative e-mail specified in the appliance wizard or screen. Tab to the Disable Backups button to turn automatic backups off again.
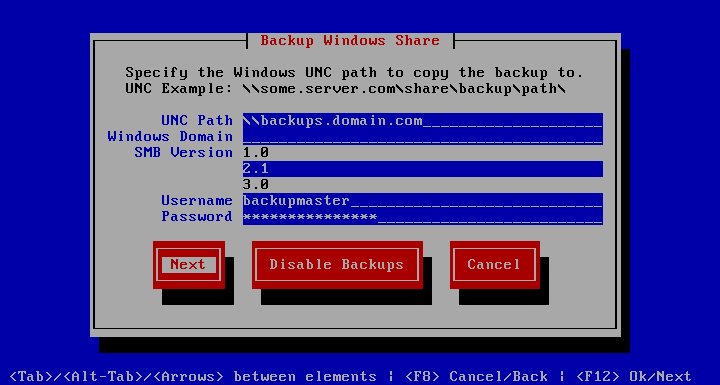
The second screen collects information regarding scheduling and backup retention. The Interval option sets whether to run backups every 1,6 or 24 hours. The Start Time setting specifies at which minute, and with the 6 and 24 hour intervals, which hour, the backup is to be run. When Interval is set to Every 6 Hours and the Start Time is set to 23:15, backups will be made at 5:15, 11:15, 17:15 and 23:15. The Backup Retention setting can be used to delete backups after a week or month. When it is set to Forever, no backups are ever deleted and the administrator must ensure that adequate disk space is provided.
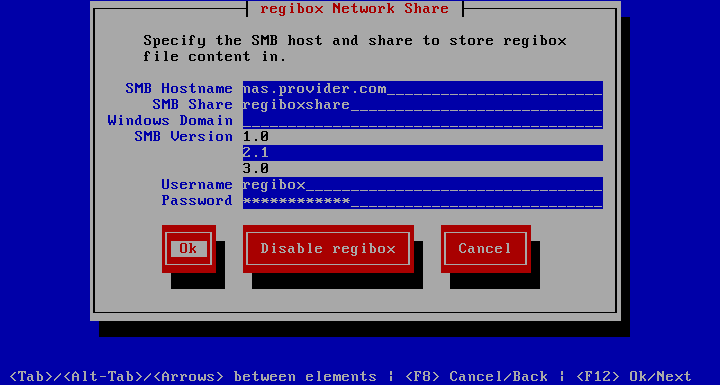
Configure regibox
regibox consists of meta data and file data. While the meta data resides in the database and is replicated over all provider systems behind a load balancer via MySQL replication, the file data must reside on a commonly accessed SMB network share. High availability and redundancy must be managed internally by the network share hoster. This dialogue needs to be completed on each provider node to enable it to offer regibox functionality. While the Windows Domain field is optional, all other fields are mandatory, meaning the share has to require user credentials. The share should exclusively host regibox functionality, to prevent file locks and other potential instabilities. All data on the share is encrypted.
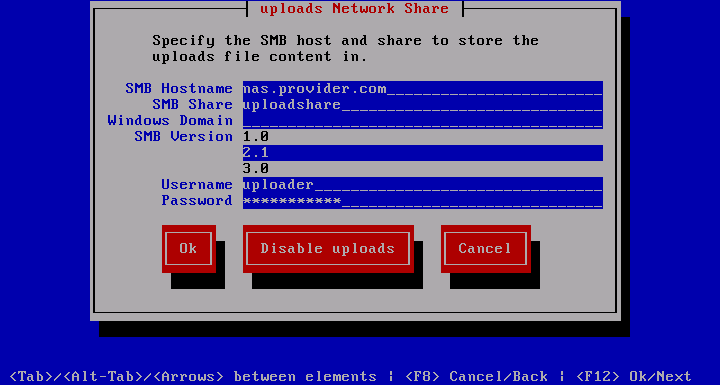
Configure uploads
This dialog configures an SMB share for storing RGF file uploads. Using this, recipients can open their regify files directly from the regify provider. Currently, this is only needed if you’re offering regipay plus. High availability and redundancy must be managed internally by the network share hoster. This dialogue needs to be completed on each provider node to enable it to offer uploads functionality. While the Windows Domain field is optional, all other fields are mandatory, meaning the share has to require user credentials. The share should exclusively host the uploads functionality, to prevent file locks and other potential instabilities.
Restrict Admin Access
This dialogue makes it possible to restrict access to https://regify.providername.com/admin/ to a limited set of IP numbers or subnets. It is optional, but highly recommended for locking down the administrative section, in order to protect it against potential password attacks. Leaving the field blank will allow access to any IP number. This dialog can also be used to reset the admin password. This is only necessary when the password has been lost somehow.
Start/Stop Web Server
means if the service is running you get the option, if it is not you get the option, meaning these options also serve as an indicator of whether something is running or not.
Updates
The top entry of the appliance menu is Check for updates. When that option is exercised the system will consult updates.regify.com to see if there are new patches for your current version and whether there is a new major version available. You will be prompted to confirm each after which the system will install what you have confirmed. If you choose No to all upgrades, the system will remain unchanged.
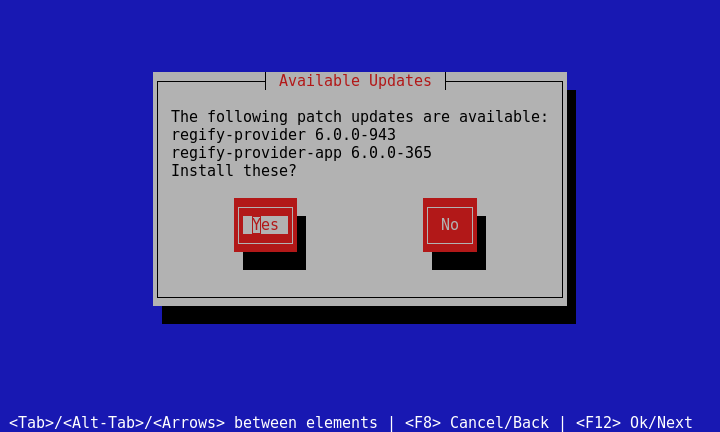
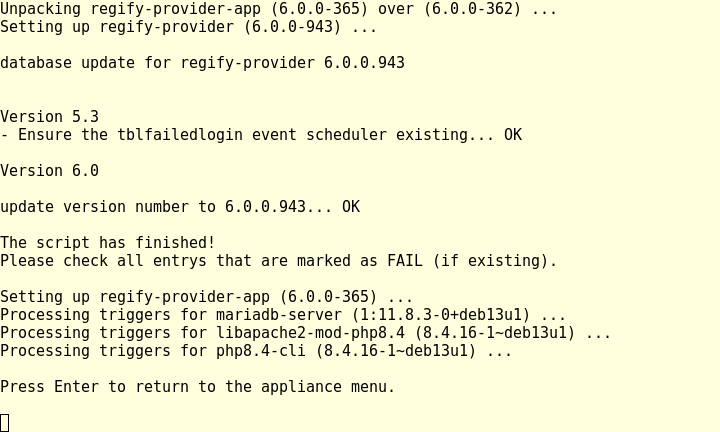
If you have upgrades that you want to install, you will get to follow the installation progress and are prompted to press enter at the end, to return to the appliance menu.
If the appliance menu has been updated, you will be prompted to reload it by simply pressing Enter.
| The appliance can only upgrade one major version at a time. |
This means that after you have upgraded to a new version, it will automatically check for the next version. If you reboot due to a new kernel, you should again Check for updates, as there may be another major version available. Major version change in this context means 3.1.0 to 3.2.0 or 3.1.0 to 4.0.0. Patch updates mean 3.1.0 to 3.1.1. You will always be updated to the latest patch version when upgrading to a new version. If you are on version 3.1.0 and the following versions are available:
-
3.1.0
-
3.1.1
-
3.2.0
-
3.2.1
-
3.2.2
-
4.0.0
You will first be prompted that the 3.1.1 patch updates are available. Then you will be informed that a new version 3.2.2 is available. If you upgrade to the latest and run Check for updates again, you will be informed that a new version 4.0.0 is available. You may at that point confirm the upgrade to proceed to that version. If you run Check for updates again, you will be informed that there are no new updates available. At this point you know you have the most up to date system.
Updating the Provider Configuration
After an update you need to visit the administrative section of your Provider installation, to apply any missing or changed configurations.
Howto
This section contains short tips for things that may arise.
General Things
Become root
This is sometimes needed. There are several ways to do this:
-
Log into the local console of the appliance and enter
rootand the root password. -
When SSH Settings has Allow root login set you can log in via SSH as
rootand the root password. -
When logged into the appliance menu go to Drop into shell
su -followed by the root password.
Appliance Shutdown
If you like to turn off the regify Provider Appliance, log in as root and enter:
shutdown -h nowStatic Appliance Memory Limit
This pertains to setting the amount of available memory that the web server sees when deciding to spawn or stop connections. This is normally done automatically and needs no configuration. If you are running a virtual machine with variable memory resources, also known as ballooning memory, the amount of memory seen by the virtual machine varies and increases with its use. If for some reason the web server decides to not grant connections even though there is memory, this can be set the override what the server sees. Beware that if the server does not get the specified amount of memory, proceeses will be killed due to Out-of-memory errors. If the system sees more memory than specified, this setting will be ignored.
| The instructions below assume that you are logged into the appliance via SSH as root. |
Here is an example to set an 8GB memory limit
echo 'AvailableMbMemory 8192' > /etc/apache2/conf-enabled/static-mem.confTo remove this setting again
rm /etc/apache2/conf-enabled/static-mem.confRestart the Server
After either of these, the web server needs to be restarted. There are several ways to do this.
The Automatic Way
-
This rewrites the configs and restarts the webserver the right way
providerConfig -o updateConfThe Manual Way
When there is no desire for rewritten configurations, the following will also work:
-
When there is no regibox, simply restart the webserver
systemctl restart apache2.service-
With regibox, the socket server needs restarting to prevent the webserver from hanging due to websocket connections
systemctl restart lwsws.service apache2.servicePostFix E-Mail Service
The regify Provider Appliance runs a PostFix server as MTA. You can use the following tricks to get a closer look:
Monitor the Mail Log
Useful to see what happens when trying to send something.
xtail /var/log/mail.log| Press Ctrl-\ to stop. |
Investigate the Mail Log
You could also use look and search using vim.
less /var/log/mail.logInspect the Mail Queue
regimailqFlush the Mail Queue
May speed things up after you changed something.
postqueue -fDelete all Deferred Messages
-
Removes them from your mail queue (remove all hanging and/or delayed):
postsuper -d ALL deferredNetwork Related
SSH Login Ip
This may be needed for SSH Settings Allowed IP/Subnet and is shown in View Settings under Connected from.
Networking Diagnostics
If you have networking issues, please always use the diagnostics first!
Enter your regify appliance menu and go to Run Diagnostics. The result should point you to most of the possible sources.
Timeserver
If it happens that your time does not sync and is off, you can force a re-sync as root run running:
timedatectl set-ntp 0
timedatectl set-ntp 1
Enable Nagios Support
Please note that we ship the nagios modules. But you need to know and understand nagios and how it works. regify does not support you in setting up your monitoring environment.
-
Become root and install the nagios modules and the nrpe server.
apt-get install -y --no-install-recommends nagios-nrpe-server monitoring-plugins-
The installation enables and starts the nrpe server automatically. You may disable it using
systemctl stop nagios-nrpe-server.service
systemctl disable nagios-nrpe-server.service-
Edit
/etc/nagios/nrpe.cfgto fit your needs followed by
systemctl restart nagios-nrpe-server.service-
To open the firewall to your nagios server ip, run the following
/usr/libexec/regify-provider-app/fwop -p 5666 -s your.nagios.ip-
To close the firewall to any nagios again, run the following
/usr/libexec/regify-provider-app/fwop -p 5666 -a0Enable Zabbix Support
Please note that we ship the zabbix agent. But you need to know and understand zabbix and how it works. regify does not support you in setting up your monitoring environment.
-
Become root and install the zabbix agent.
apt-get install zabbix-agent2-
The installation enables and starts the zabbix agent automatically. You may disable it using
systemctl stop zabbix-agent2.service
systemctl disable zabbix-agent2.service-
Edit
/etc/zabbix/zabbix_agent2.confto fit your needs followed by
systemctl restart zabbix-agent2.service-
To open the firewall to your zabbix server ip, run the following
/usr/libexec/regify-provider-app/fwop -p 10050 -s your.zabbix.ip-
To close the firewall to any zabbix again, run the following
/usr/libexec/regify-provider-app/fwop -p 10050 -a0Renew SSL Certificate
| All your certificates and key must be in PEM-Format. The regify appliance cannot deal with IIS-Certificates like .cer or .p7 formats. If you only have such, you may want to convert using OpenSSL (google is your friend) |
To upgrade/renew an existing SSL certificate, follow this guide:
-
Get certificate signing request from Show Cert Request
-
Copy the certificate request and use this to get it signed by your certificate vendor (please ensure compatibility for Apache or PEM-Format)
-
Prepare the signed certificate
-
In most cases, the certificate you bought consists of the final certificate and some more intermediate certificates.
-
It turns out to be helpful to open up your favorite text editor to copy all intermediate certificates and the final signed certificate into one file.
-
The order is not important. Only your signed cert and all intermediate certs must be in here. Use this compiled information for copy & paste in the next step.
-
-
Install signed certificate using Import Cert & Optionally Key.
-
Test it
-
You may go to some SSL certificate test tool like sslshopper and verify your domain for a valid certificate.
-
Adding a Subprovider
The following steps describe how to add a subprovider. We will assume that the machine is called host1 that the new provider is called provider2.
-
Visit the appliance menu of host1 and go to .
-
Choose provider2 as Server Name.
-
Visit to copy the certificate request.
-
Get the certificate request signed.
-
Import the signed certificate request or complete PEM formatted key pair if the request was generated elsewhere.
-
See the Setup a Subprovider documentation for further instructions.
In a Cross Master Configuration
Here we need to install the same certificate on the other host. We will assume that the second machine is called host2.
After this you will be able to administer the newly created subprovider as usual by pointing your web browser to https://provider2/admin/.
Activating regibox
To activate regibox on your regify Provider, please follow those steps:
-
First, check for updates to make sure that you run the most recent appliance version.
-
Provide an adequate SMB-share in your network-range.
-
Activate regibox in your regify Provider appliance menu by visiting .
-
If you like to activate regibox by default for all new regify accounts, please edit and add:
define('ENABLE_RGB_FOR_ALL', TRUE);If you do not set this flag, new regify users will not have regibox activated by default.
| Activated regibox users cause cost, based on the regular regify price list! |
-
You can also re-define the regibox default size for all users with no individual regibox size (default is 2GB). For this, add the following to your :
define('MAXBOXSIZE', 5); // new default size 5 GBThis will set the default size to 5GB. If needed, you can overwrite the default value in the individual users' product settings.