regify client Deployment
Introduction
This document is meant to help you deploying the regify client software to the clients computers using software distribution methods.
Description of the setup process
Setup process
To be able to deploy the regify client software, you need to know some more detailed information about the setup process. As regify delivers only provider-neutral setup files, the customisation may need additional files.
After initial setup and first usage, the regify client detects the missing configuration. Upon this, the user is asked to enter his login credentials in order to configure the client and to check for successful login. This is done using the PLS service (Provider Lookup Service).
| To get the customization, the regify client automatically downloads his customizing information from the assigned regify provider. |
On Outlook 2013 or later, the installer installs the regify client and executes a separate setup for the Outlook AddIn. Thus, you will find two programs in the list of installed applications of Windows.
|
Please note that OL2010 is not officially supported any more! The AddIn may work or not! |
The uninstall tool
If you uninstall the major regify client setup, it also is running a small tool called uninstall-tool.exe (located at system folder) with parameter OUTLOOK. This is silently uninstalling all regify setups with name like "regify Outlook" left on the system. This is cleaning up all other AddIn setups. Thus, while uninstalling the major MSI, it also uninstalls the second setup. If you call this tool without OUTLOOK, it also uninstalls setups with name like "regify client"). You may use this tool to cleanup all previous regify setups. It is part of the setups since client version V4.1.0.
Individual pre-customizing
If you like to influence the behaviour of the regify client, you can add an additional file customize.ini to the same folder where the used MSI file is. It allows you to overwrite some special settings with custom values. While installing the application, the MSI looks for the file in the same location and copies it to the installation folder (only if existing). You can find information about this file in chapter Customize.ini options.
Installation preparation
After successfully installation, the setup starts the Prepare_Installation.exe. This file has been copied to the installation folder during setup. The intended purpose of this program is to prepare and finalize the installation for some external integration. The following actions will be done by this tool:
-
Search existing Lotus Notes installation and patch the regarding Notes.ini ($Regifypath).
-
Search an existing Mozilla Thunderbird or Interlink installation and create regify_client_path.dat file inside of the extension-directory (directly in application path).
After this program has stopped, the setup closes. If you have problems with one of the things done by Prepare_Installation.exe, you can run it again at any time from the file explorer (you may need to execute it with administrator rights in some situations). It does not do any output, so expect it to run with no visible effects.
Installation options
The executable setup is well designed to get used in automatic software distribution and deployment. You can call it with several options.
Silent setup
/silent 2 Force the setup to do a complete silent installation. Example: |
/logfile Creates a logfile with the name Logfile_<ProductName>_MSI.txt in your system %TEMP% folder. Example: |
During the installation, an existing previous version will get updated.
Do not install any AddIn (client only)
If you do not want the setup to install any AddIn (Thunderbird or Outlook), even if it detects such, please use the INSTALLLEVEL option like this:
/msiparam "INSTALLLEVEL=2" Installs the regify Client without any AddIn (Outlook, Thunderbird, Interlink etc). Example: For a silent setup in combination: |
Uninstalling the software
You may run a small tool called uninstall-tool.exe (located at system folder) without any parameter. This is silently uninstalling all regify setups on the machine with name like "regify*".
First use / setup assistant
Startup screen
The regify client setup forces the user to close his Outlook, Thunderbird or Interlink. It will not continue without closing.
If the software gets used the first time, the configuration automatically starts.
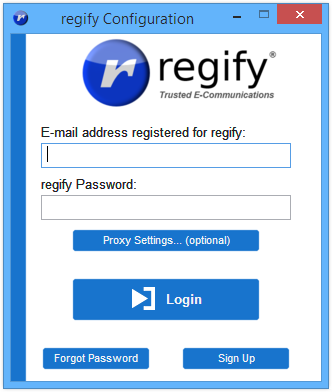
After successfull configuration, all values are written to the regify configuration file (%APPDATA%\regify\regify_client.ini).
Manual configuration
In order to enter all settings manually (without utilizing the regify PLS), please press Ctrl+m on the initial dialogue to enter the extended form. There you can enter all values manually.
Windows Registry options
Registry options of the regify client
The regify-client is the main component for every installation (Outlook, Notes etc.). There are some options about this dialog that can get manipulated using registry-values.
This are the available registry parameters that must be located in
HKEY_LOCAL_MACHINE\SOFTWARE\regify\Settings
or for 64 bit systems in
HKEY_LOCAL_MACHINE\SOFTWARE\WOW6432Node\regify\Settings
| Parameter | Description |
|---|---|
AdditionalTemp |
If you define this key, the regify client will use this path as additional temporary folder. Each attachment opened by the client will get saved in this folder before running/saving. You can also set this path using the REGIFYTEMP environment variable or using AdditionalTemp entry in customize.ini. But the registry value is always the strongest one! |
DenyUpdateCheck |
If you set this parameter to 1, the regify client does no search for available updates. Also, the search update button in configuration is disabled. |
DenySend |
If this is set to 1, the regify client denies all kind of sending activity. The creation dialogue is disabled, SMTP settings are hidden. |
You can use the AdditionalTemp option to force the regify-client to store each attachment to open on this path. If you use a virus-scanner on this folder, each content will get virus-scanned automatically and centralized.
In environments with software deployment systems, most administrators do not like external software to ask users for updating. In such case, set DenyUpdateCheck to 1 to stop the client looking for updates by himself.
If you like to hinder the regify client to send any kind of message, you can set DenySend to 1. This greys out the creation dialogue and also stops regimail creation using comandline. The SMTP settings are hidden, too. It will only work from the AddIns (Outlook, Notes).
Registry options of the Outlook addin
The regify Outlook-AddIn is the connector between the outlook architecture and the commandline-version of the regify client. There are some options about the Outlook-AddIn that can get manipulated only using some registry-values. This allows the administrator to change the AddIn behaviour and options directly.
These are the available registry parameters that must be located in
HKEY_LOCAL_MACHINE\SOFTWARE\regify\Settings
or for 64 bit systems in
HKEY_LOCAL_MACHINE\SOFTWARE\WOW6432Node\regify\Settings
| Parameter | Description | ||
|---|---|---|---|
DenyChangeAutoConvert |
If you set this parameter to 1, the user is no longer able to switch auto-convert on/off. |
||
DenyReminderSelection |
If you set this parameter to 1, the user is no longer able to select the reminder duration. |
||
DenyInvitations |
Set this parameter to 1 to disallow the user to call the local invite-dialog.
|
||
SetReminderDays |
This parameter is only available if DenyReminderSelection=1#. Upon this, the SetReminderDays parameter defines the reminder duration to use. Only allowed values are 1,2,3,5,7 and 10. All other values will end up in 5 days. |
||
SetAutoConvert |
This parameter is only available if DenyChangeAutoConvert=1. If you set this parameter to 1, autoconvert is always enabled. If set to 0, autoconvert is disabled. |
||
DenyKeepOriginal |
If this parameter is set to 1, the option to keep the original mails, as a copy in the "sent items" folder, is not available. |
||
IgnoreStore (available since client version 4.4.1) |
The AddIn scans the available stores to use for sending regimail. Here you can tell the AddIn to skip stores due to their name (check AddIn debug-log for possible values). If a store name contains this string, it is skipped. For example, if you enter "archive", it will not chose stores with a name like "Online Archive – abc@xyz.com".
|
64 bit registry information
| If you are on a 64 bit environment, please respect that your regedit.exe settings may not be visible by 32 bit apps like the regify client. In this case, try to run regedit to edit the 32 bit registry using this hint: |
%systemroot%\syswow64\regeditBackground:
In 64-bit Windows the entire 32-bit registry is located under the key HKEY_LOCAL_MACHINE\Software\WOW6432Node.
For example, on a 32 bit system:
HKEY_LOCAL_MACHINE\Software\Microsoft\MSLicensing\Parameters\regifykey
is located on a 64 bit system at:
HKEY_LOCAL_MACHINE\Software\ WOW6432Node \Microsoft\MSLicensing\Parameters\regifykey
Terminal Server and Citrix Information
Please note the following information in order to use regify client software in Terminal-Server or Citrix environments:
-
Installation
-
Install normally on the server. If you run a cluster with multiple servers/hosts, please install on all host machines!
-
-
Special settings for Terminal-Server and Citrix
-
Using Windows Terminal-Server or Citrix with more than one physical host will trigger the need of a special registry entry on each host. Please ensure, that the key mentioned in this WIKI article exists on each host machine: https://wiki.regify.com/index.php?title=Terminal_Server_%26_Citrix_Host
-
Linux options
Options of the regify client
The regify-client on Linux offers some extra configuration by using a settings file:
Debian based systems:
/etc/default/regify.conf
Other systems:
Currently, only Debian based systems are supported.
The file offers ini-style options:
| Settings | |
|---|---|
DenySend |
If this is set to 1, the regify client denies all kind of sending activity. The creation dialogue is disabled, SMTP settings are hidden. |
Customize.ini options
As described in the description of the setup process, the file customize.ini can get used to pre-customize some of the initial settings of the regify client. It must be located in the same folder than the setup itself (EXE). The setup then detects this file and also copies it to the destination folder for the regify client during the setup process.
Automatic copy of this file only works on Windows systems. You need to place this file manually on Linux or MacOS.
| The file customize.ini should be saved using utf8 encoding with a byte order mark (BOM). |
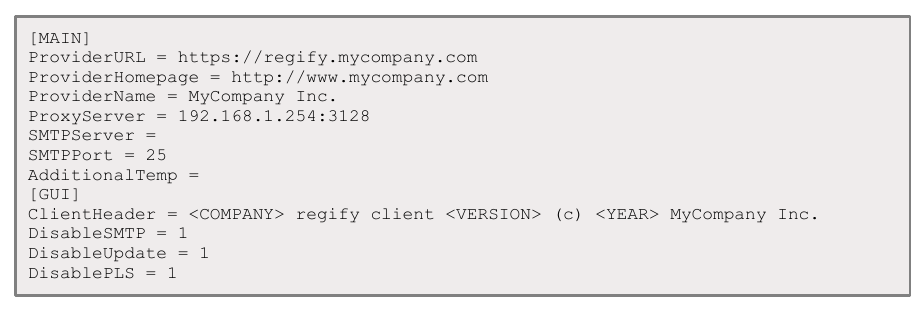
The file is divided in two sections. The available parameters are:
| [MAIN] | Override [1] | |
|---|---|---|
ProviderURL |
The url, which will get used for regify communication. It must be a https:// url. This is mandatory if DisablePLS = 1. Example: |
yes |
ProviderHomepage |
This link will get called, if the user clicks on the provider-name on the lower left. Example: |
yes |
ProviderName |
This is the name of your regify provider. It will be clickable and opens the URL defined using ProviderHomepage. |
yes |
ProxyServer |
This allows you to set a default proxy server (like 192.168.100.1:3128). It will be the default in the setup assistant, if the user configures his regify client. To pre-define a PAC file, start this with PAC: followed by the PAC file location. Examples: |
no |
SMTPServer |
This is the pre-fill information for the smtp-server field. You are allowed to leave it empty. |
no |
SMTPPort |
This is the pre-fill information for the smtp-port field. You are allowed to leave it empty, but you should set it with 25 (strongly recommended). |
no |
AdditionalTemp |
If you set this to a valid path, this path is also used to temporarily save attachments from rgf files while saving and storing. It can be used to test files with an additional „virus scan share“ in the network. |
- |
| [GUI] | Override [1] | |
|---|---|---|
ClientHeader |
This parameter defines the displayed header of the regify client window (reading dialogue and standalone creation dialogue). The following place-holders are allowed: <VERSION> = inserts the version number of the regify client Example: |
yes |
DisableSMTP |
Set this parameter to 1 to disable all SMTP related dialogues in configuration. |
yes |
DisableUpdate |
If you set this parameter to 1, all automatic updates are disabled. It is the same than the registry-option DenyUpdateCheck some pages above. |
yes |
DisablePLS |
If you set this value to 1, the system is not trying to use the provider lookup service (PLS) to get user-data and configuration. If you are using this option, please ensure that ProviderURL contains a valid provider URL that is accessible by the clients! |
yes |
| Some of the values might no longer be valid in regify client 4.x or newer. |
Example customize.ini:
Other resources and help
You can find other information about the regify client, troubleshooting, changelogs, FAQ and technical hints on the regify WIKI pages: